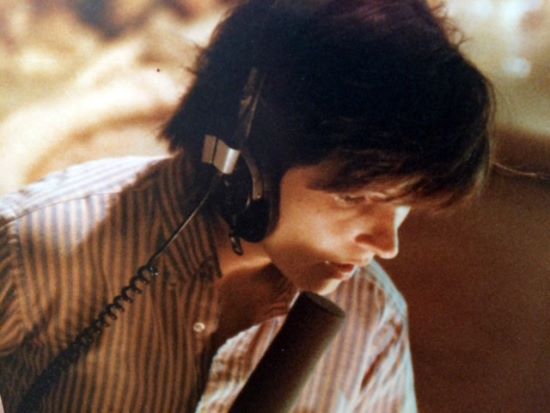
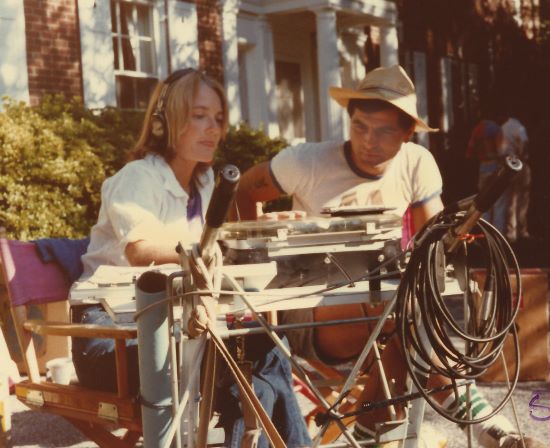
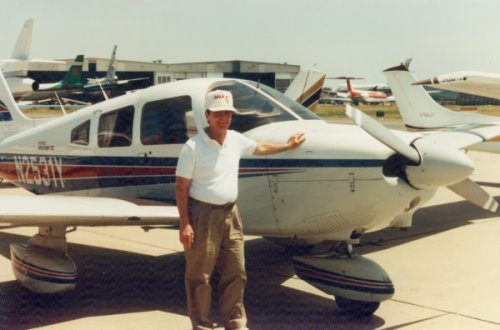
by Mary Jo Devenney
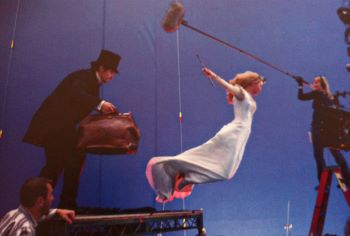
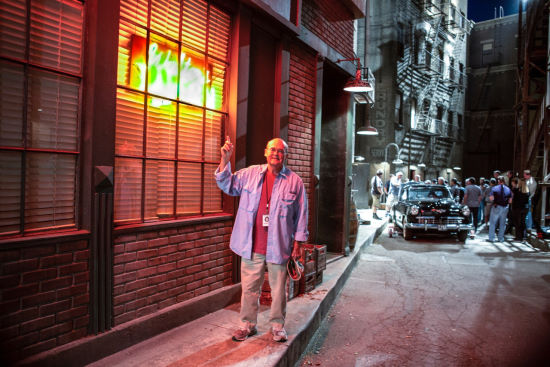
1. INT. FILM SET — FIRST DAY OF SHOOTING
FRIENDLY CREW MEMBER
Hello! You must be our script supervisor.
ME
If I am, we’re all in big trouble.
Can you guess what I do?
FRIENDLY CREW MEMBER
Gee Mary, Set decorator? Props? Medic?
Teacher? Dialog coach?
ME
I’ll be your Sound Mixer.
Call me “Mary Jo” and no one gets hurt.
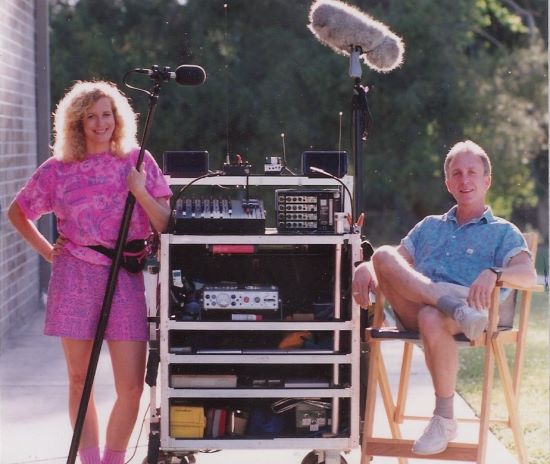
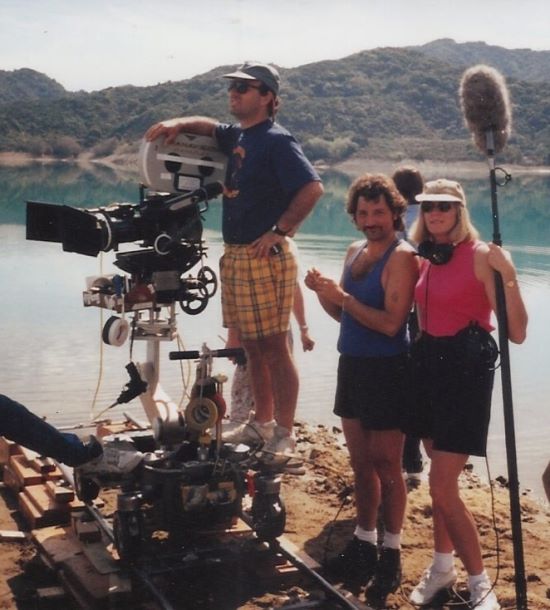
I don’t mind not looking like the person that people expect to see. I love being on a film set. It’s home. It’s comfortable. I know what needs to happen there. Years ago I was catching up with a friend from film school who was working in Post, and he laughed, “You’re a total set animal!” He was right.
As a kid, I watched a lot of movies. I was an only child till age eight and went to an all-girls’ school whose vacation time was always longer than at my friends’ neighborhood schools. With much time to fill, movies became my friends too. After a women’s college in Massachusetts (What was I?—Nuts?), I drove from suburban Phillie to USC film school to experience co-education for the first time. Surrounded by film lovers, I totally fit in. We were making movies! The ultimate project for most of us was a class called 480. This course had five to seven student crews make sync-sound 15 to 20-minute mini-features. I shot one, recorded one and wrote and directed one. A couple months later, a classmate called to say he was “bailing” on a boom job and I should apply. They didn’t ask if I’d ever done it professionally, and I was off to Rochester, NY, to boom Fear No Evil, a horror movie that shot for nine weeks. I had the distinction of being the only crew member flown in from LA who was working for a totally deferred salary. I got $53/week per diem. As far as I was concerned, I’d arrived. This was before video assist and video village, so the Director, Script and I haunted the frame line during shots. Having just directed my own (student) film, I made lots of suggestions to the forgiving, first-time Director (What fun!). The last week of shooting, the Mixer had a tiff with the Producer and left. With a locally rented Nagra, a 415, a smart PA to boom and much apprehension, I mixed the last two days.
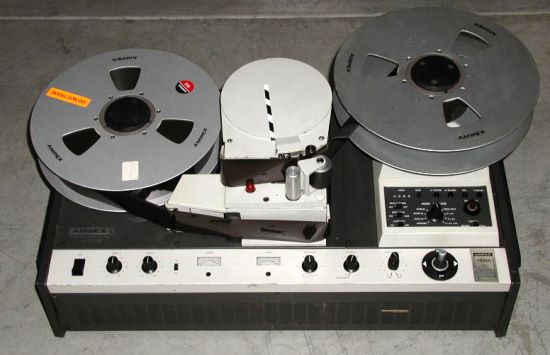
Back in LA, I couldn’t find a production job and wound up working at Richard Einfeld Productions, a little sound house. I did sound transfers, ¼” tape to 16 mag and 35 mag. I also auditioned and sold sound fx from a ¼” library that Einfeld had compiled with partner Frank E. Warner, the Supervising Sound Editor on some of the biggest films of last half of the twentieth century. I’d get calls to transfer some sound effect for Being There, and send it over to his editing room. On his next project, he came in and had me put tapes on the Ampex. “Get that loon (the bird) track out and load it backwards.” Then he’d manipulate the tape with his hands, slowing and ‘wowing’ it while I recorded it to 35 mag stock and voilà, it became the sound of a punch that would land on De Niro’s face in Raging Bull. As cool as this was, I found myself listening during transfers to what the crew guys said before “action” and after “cut” on the set of Roadie. I knew I should be on a set.
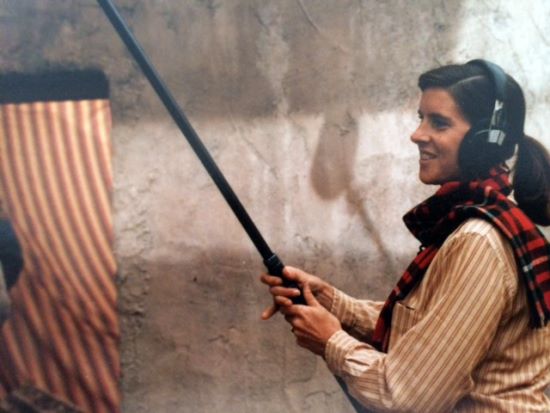
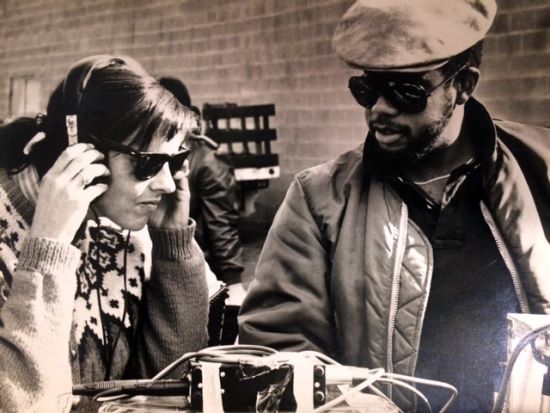
I was lucky to have a former co-worker remember me in a good light. The Key Grip on the New York film recommended me to Anna DeLanzo, an experienced Boom Operator who was about to mix a low-budget movie for Cameraman/ Writer/Director Gary Graver. She needed a Boom Operator and hired me. I have repeatedly discovered that you can never guess who might recommend you. It could be the usual suspects: UPMs, Directors, Post Production people, or it could be anyone from Grips or Accountants to DPs or ADs. On the film in question, one of the actors was Gene Clark, a veteran Boom Operator who worked with great Mixers like Jim Tanenbaum, CAS. So there I was: booming a Boom Operator for a Boom Operator. Both Gene Clark and Anna DeLanzo knew more about what I was doing than I did. I learned so much from them about the art of booming (and it is an art as well as a technical exercise) and this time I was actually getting paid a little! I loved/love booming.
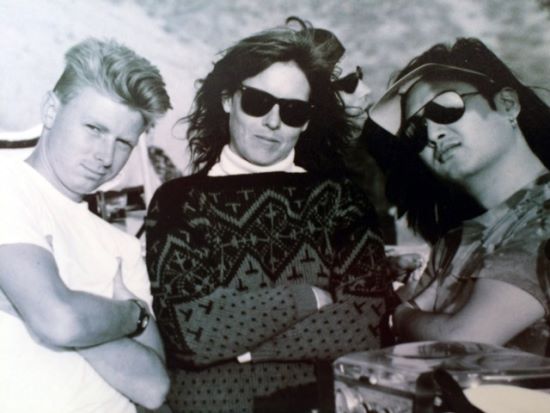
When I didn’t get calls to boom, I would mix. Ron Curfman was a Mixer of shows like Dallas and a shrewd businessman. He owned a little recording studio and told me and others that if we got mixing jobs, he’d make sure we had enough equipment to make it worth our while. Then he’d get the contract to do the sound transfers and the syncing of dailies to make it worth his while. If you needed work, you could make $10/hr performing these jobs on other people’s shows. A group of us met through him, boomed for each other and shared work. Decades later, several of us are still in touch and still sharing jobs.
I got to work on The Executioner’s Song, an NBC miniseries that was nominated for the Sound Emmy. I also got to work on a movie in Spain called Hundra, the making of which was much more entertaining than the movie itself. I would plan the setup and then the Producer/AD would turn on the Nagra while I boomed.
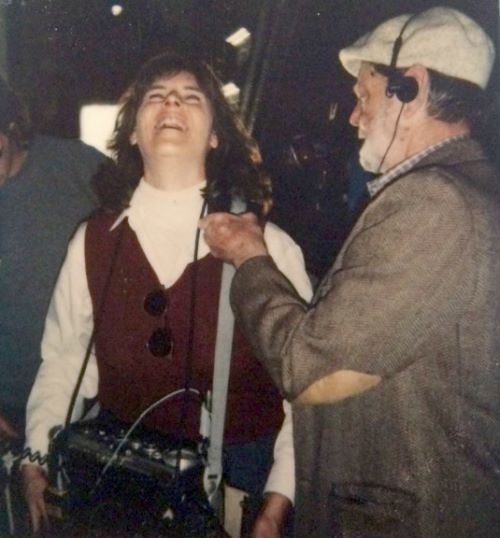
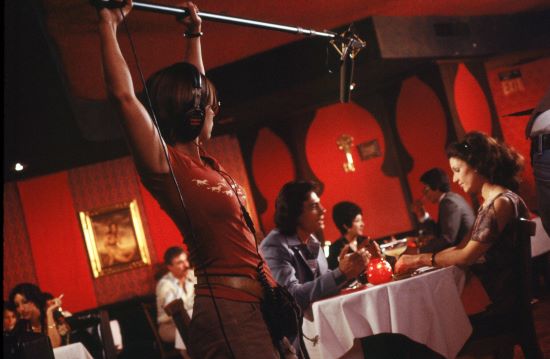
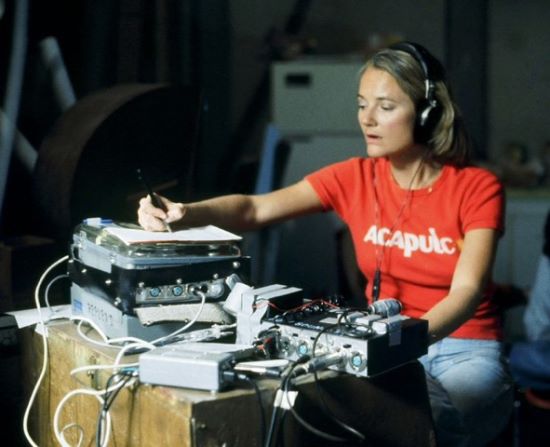
OK, so in the midst of this I got pregnant. Would that affect work? I described booming to my doctor and he assured me that I was healthy and that prenatal kids are very well protected and I could stay as active as I wanted. So I did. Never considered petite, I ‘passed’ as non-pregnant for months, then entered a phase that still makes me laugh. People would look and I could see that they were about to ask if I was … but they’d stop themselves, realizing how embarrassing it would be if I answered, “No, not pregnant; I’m just a big girl.” As time went on, work got interesting. There was a lot of twisting sideways to keep my stomach out of frame. When moving between C-stands and the camera lens, what used to be accomplished with a gut suck now required deep knee bends to pass my neck through the tight spot. Maybe it was hormone-induced, but in the middle of a shot I’d think, I’ve got this guy totally on mic ‘and’ I’m making a human being. Talk about multitasking!
I was three weeks into the TV movie Murder: By Reason of Insanity and no longer ‘passing’ when, after the second sixteen-hour day in a row, I cried “uncle.” I was too tired. I’d had Laurie Seligman (great Boom Operator) standing by and asked her to take over. That was May 8. My daughter, Roma Eisensark, was born May 18. To this day, she knows when to be quiet on set.
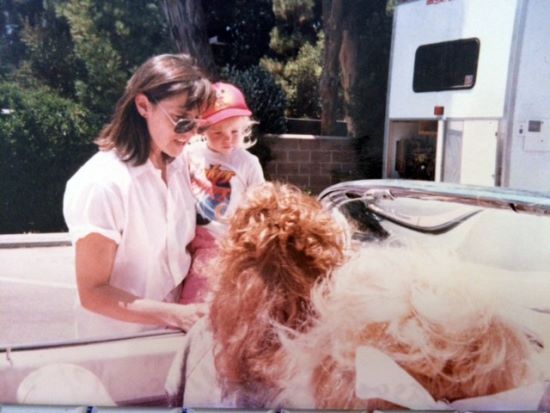
That July, Russell Williams II asked me to work with him on Cannon Film’s Invaders From Mars. “You bet!” I said. Not only was it was always fun to work with him, but this precious, beautiful infant, while priceless, came with a big price tag. Invaders shot for twenty weeks. The lovely Louise Fletcher let me use her motor home as a bottling plant (don’t ask). A couple movies later, I got to work on the last five weeks of another non-union Cannon film, Masters of the Universe, with Ed Novick. Cards were signed. Cannon agreed to go union if there could be deals for projects under six million dollars, and with that, the union tier system was born. After seven years of knocking on 695’s door, I was in! (And I don’t believe Cannon ever made another movie in LA.)
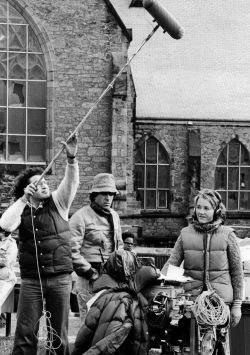
I must interject a side note here as a few people who have seen this writing in progress feel that the sound person/ motherhood dynamic is important to my story. I was as lucky in parenting as I was in having the strength to work pregnant. My husband, Dave, is a writer and a wonderfully committed parent. He worked at home and carried the ball when I worked long days or nights. Of course, he did turn more to short stories during Roma’s first year and she could sleep with her head next to a Smith Corona electric typewriter. I think we all enjoyed my times of ‘unemployment’ when I could take over the caregiving. The three of us went to Philadelphia when I boomed Mannequin and Seattle when I mixed The Chocolate War. I had all the advantages of anyone with a work-at-home partner unlike many of my sisters and brothers in the business. Single parents are beyond heroic!
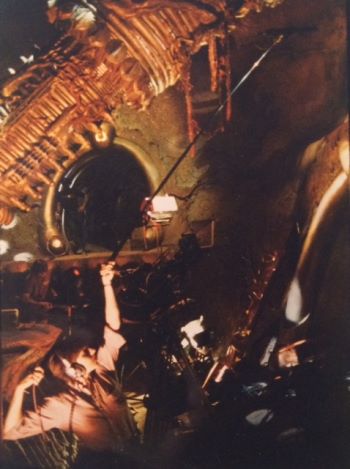
In the fall of 1989, Russell Williams was mixing the fourth month of Dances With Wolves. The show was going to go an extra month. (“Thank you” to the headstrong wolf playing Two Socks!) Russell had plans that would conflict, so he tapped me to come and finish the film. I still get goose bumps when I remember reading the script on the plane to South Dakota. It was great. I inherited the wonderful Boom Operator Albert Aquino, who, sadly, we lost three years ago. Everyone was friendly; there was just one problem. Most of what was left to shoot were tepee interiors. The plan was for the Special FX crew to do gas campfires via hissing pipes that the cast would sit around. I approached the DP, Dean Semler, not knowing then that this great Australian bear of a man was as much of a collaborative filmmaker as he was a visual artist. “Would it be possible to use real fire for these campfires?” I asked. “There’d still be noise but it would be the right noise.” “Well, that’s my main light source for these scenes,” he said, but “I’ll check with the FX guys to see what’s possible.” We went with real fire! Camera people have since told me that the visual warmth of real flames looks better than the bluish gas fire. Maybe it wasn’t a concession made for the sake of sound, but it’s been a great argument when I tell camera that one guy who went along with my request got an Oscar. So did Russell, and he mentioned me in his acceptance speech.
I could go on like this for another twenty-five years but, out of compassion for the reader and a realization of the size of this magazine, let me say that I have kept working to this day. Let me share some of my conclusions about being in our field.
A film is created in the editing room but, on set, we’re making the raw material. I’m always trying to hand over silk material from what is often a sow’s ear environment. It’s hard to re-create an actor’s magic if we don’t get it when it first happens, so capturing that moment is the goal. When we succeed, the magic and the budget both benefit. If the sound is good, I drive home happy even if the day’s been physically tough, or emotionally unpleasant. If I know the sound will need some fix in Post, I’m unhappy no matter how comfy the shooting day was.
As sound people we’re often at the mercy of others, so I try to speak everyone’s language. Working with every department (and understanding their goals and tools) will get you much further than many of the newest gadgets you can buy. (I am, however, grateful for radio microphones that work as originally promised decades ago. I’m also grateful for digital recorders with as many tracks as I have microphones so that Post can perfect my real-time mix. I’m particularly grateful that digital recorders won’t allow me to accidentally record over that last printed take that the Director asked me to cue up.) Being a woman might help in dealing with wardrobe and finding creative ways to hide microphones. Actresses are the people who most often say they’re glad I am a woman. I mention that I’m a recovering soccer mom and will leave this person looking neat. I suppose that’s proof that we’ll all play the stereotype card when it’s useful. But like all preconceptions, nothing’s true all the time. I try to evaluate mine often and dispel preconceptions about me. With a new crew, I always try to demonstrate that I understand what Camera, Grip and Electric are up against. It’s good to point out that the genny should move before the cab’s engine has stopped, and I always thank the people who have to lug out more heavy cable to reach it. There’s a line in the movie The Imitation Game that expresses my experience so perfectly. Joan Clarke explains why she’s been friendly to a co-worker that Alan Turing consistently antagonizes. “I’m a woman doing a man’s job,” she says, “I don’t have the luxury of being an ass.”
I talked to Brent Lang for a Variety (July 29, 2014) article about the small representation of women below-the-line in production. He asked if I was paid less for the same work. I said, in a sense, “yes” because I tend to get lower budget shows as a Production Mixer. Not only is there less money for sound but, as the budget falls, getting good sound tends to be harder. This is because of all the other money compromises, like worse deals on locations, older equipment used by other departments, smaller staff and shorter schedules. Of course, the boys work these shows too, but it sure feels like they move on sooner. (Again, nothing’s true all the time.) The positive side of low budget is the chance to master knowledge of new wave equipment and practices that will make their way up the production ladder—wide-and-tight, RED camera, ‘D’ cameras, etc.—before the rich producers start to use them. It’s also a chance to be available for the occasional innovative or true “labor of love” film where you can feel very appreciated and integral to its success. I’ve been lucky to see some really good movies while I was recording them. (Including two movies that my husband wrote and produced, one of which was Monkey Love, a comedy starring Jeremy Renner in 2004. Yes, shameless plug.)
My parents chose a girl’s school partly to round out their little tomboy. It probably had the opposite effect. If you wanted to do something, there was no one to stop or slow you down by “helping” you. It wasn’t the place to learn about gender norms. There was no reason not to be a leader. You could be the president of the dramatic club or on the school paper or on the varsity basketball team. If there was a drawback, it was that I didn’t learn to navigate a system that treats you as different or less acceptable. I still work at understanding why people would object to you doing whatever you’re able to do. When we get out of the pass-van on a location scout, it feels a lot like taking the field as a member of a team on which I’ve earned my spot. I loved that feeling in school and love it now.
The bottom line is, it’s a great job. If it’s taken a bit more time and work because of artificial obstacles, I figure you just take a little extra pride in what you do achieve. I owe a tremendous debt to the 695 “brothers” that I’ve worked for, and with. I was going to list them but it’s a very long list. I cheer their successes and those of my ever-increasing number of sisters.
PS: As I write, it is over a year since the loss of my friend and mentor of longest standing, Lee Strosnider. He was perfectly generous and professional. He would explain equipment and rent it to me at all hours knowing I’d pay when possible. His stories and nuggets of advice were as interesting as they were long. I miss him.


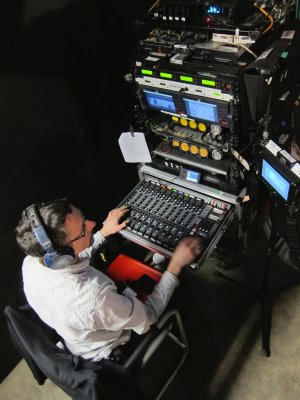
 passport, a flat in London and the contacts to pull together a good local crew for the show. Ben came aboard as my Boom Operator and we brought on local London Production Sound Mixer Tarn Willers to handle the sound utility position and act as our Second Unit Sound Mixer. We also brought on Tim Surrey to work as our fourth, along with Sound Utility Frank Barlow, who came in frequently as our top dailies hire.
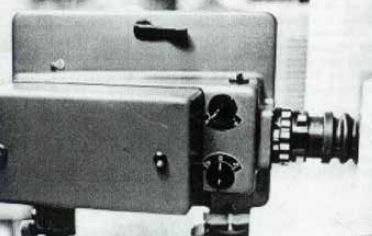
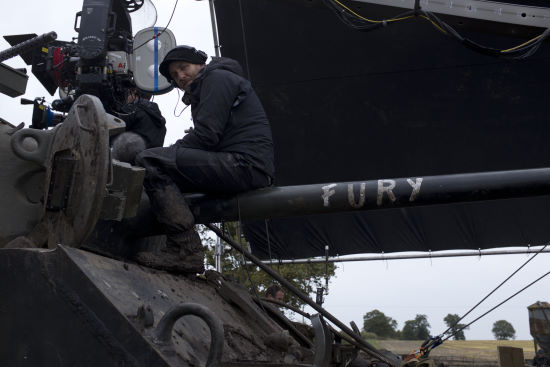
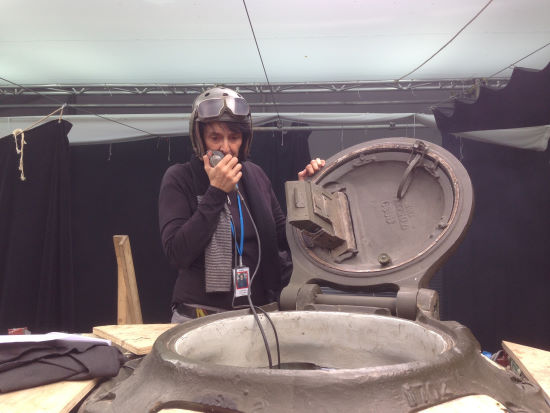
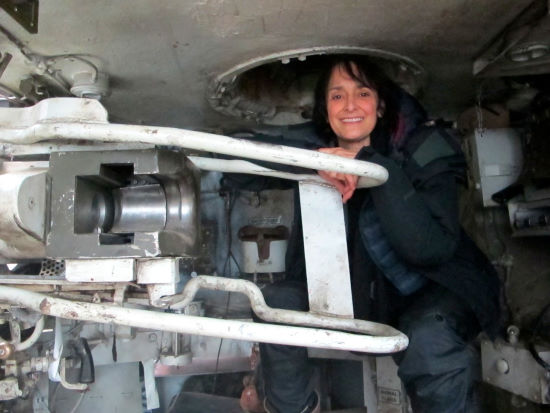
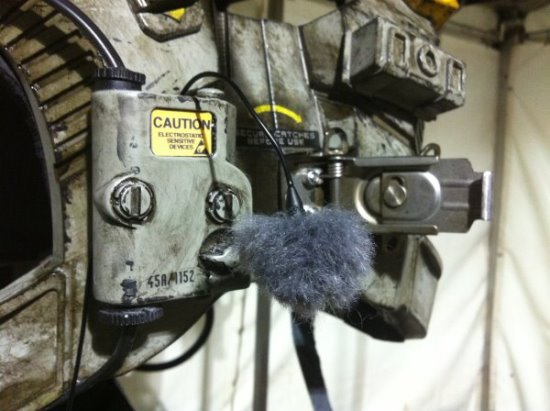
 In our first discussions regarding this project, David Ayer indicated to me that, in addition to our production microphones, he wanted to try to record dialog tracks through the vintage microphones used in the original Sherman tank communications systems. Many World War II Sherman tank crews used a SCR-508 turret bustle-mounted radio/interphone system that allowed the five-person tank crew to communicate with each other (interphone) as well as allowed the tank commander to communicate via the FM radio set with other tank commanders and military personnel outside the tank. The tank crews had communications components, including their headphones and microphones, integrated into their military-issue apparel. The headphones were wired into the tanker’s helmet and connected to a push-to-talk switchbox and a throat microphone that was then connected to a communications box at each man’s station in the tank. The tank commander uses the same style helmet; however, his microphone is a push-to-talk handheld microphone. Dave asked me to look into options for recording our cast’s battle scene dialog through these microphones, using either vintage radios in our tanks or through modifications that would leave the outward appearance of the vintage gear intact.
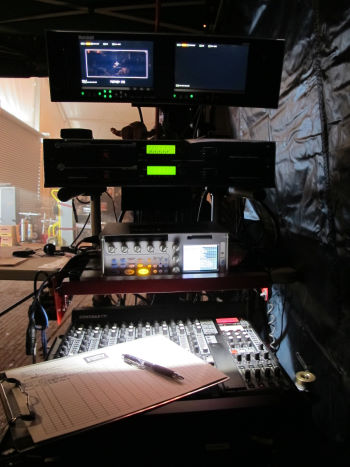


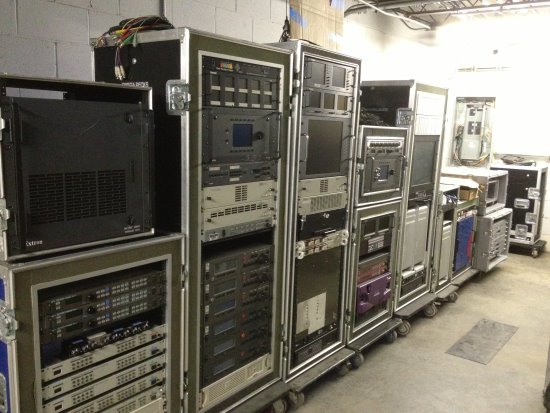
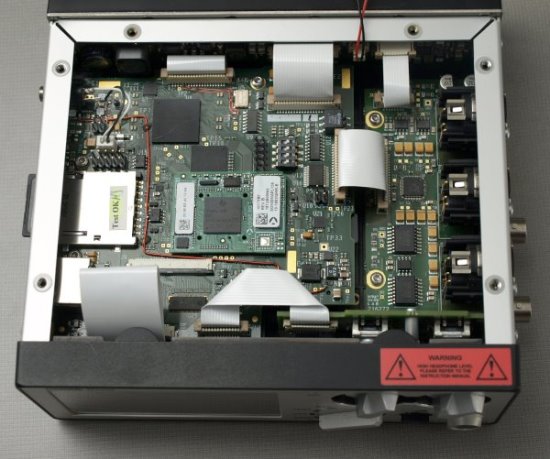
 The 970 is a half rack, 2U device capable of recording up to sixty-four tracks to multiple drives. There are two front-panel drive bays and two eSata drives accessible from the rear panel. The drives may be configured for simultaneous or sequential recording as needed.
 Dual power inputs through standard 4-pin XLRs provide operational redundancy. In the event of a failure of both sources, proprietary PowerSafe™ circuitry provides ten seconds of reserve and an orderly shutdown.
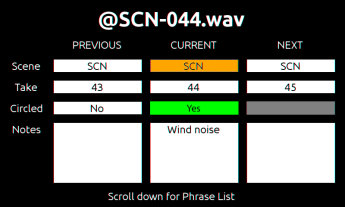 Similar dedicated keystrokes give access to the Metadata screen where scene number, takes, notes and other functions may be rapidly edited. Commonly used phrases may be selected and edited from a list manager.
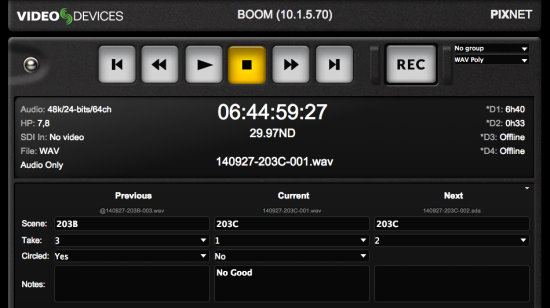
 File metadata editing of scene name, take name, notes, track names and reel folders can be done across all drives during, before and after recording.
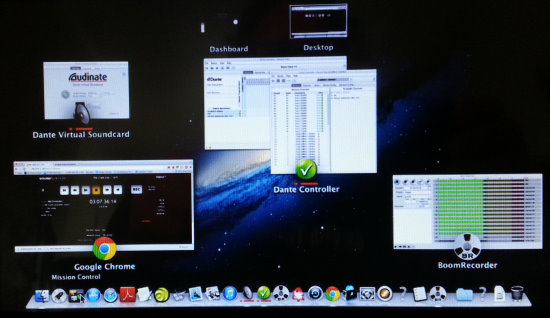
 Aside from our most important responsibility of mixing great tracks, we have the added duties of accurate metadata and arming and disarming of tracks. These operations are available both directly on the 970 and via PIXNET.
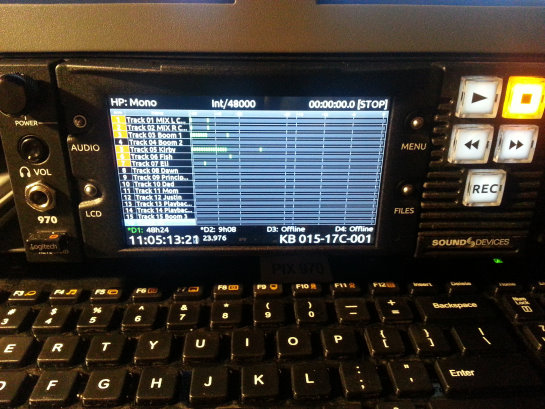


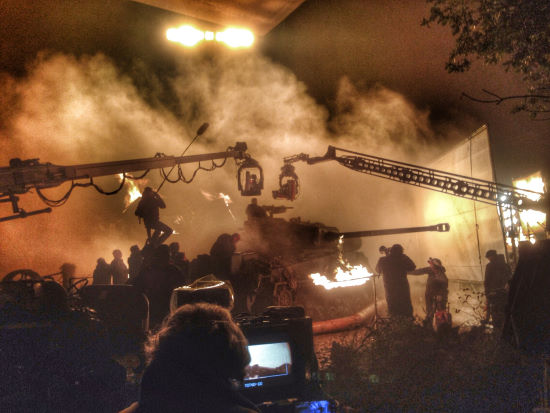
 It’s enough to set any Sound Mixer’s alarm bells ringing on multiple fronts although the bells were largely inaudible over the din of the action.
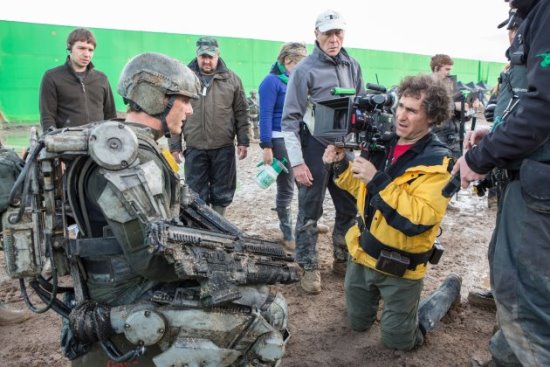
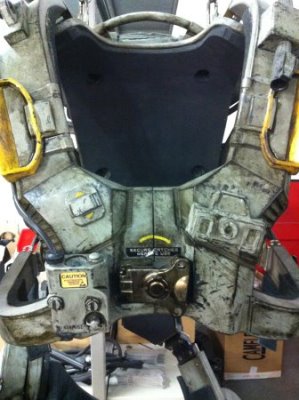 The team who built the Exo-suits was responsible for getting the actors in and out of them every day, making necessary adjustments and keeping them all working smoothly. They were a crack team, and ready with a can of oil to prevent squeaks.
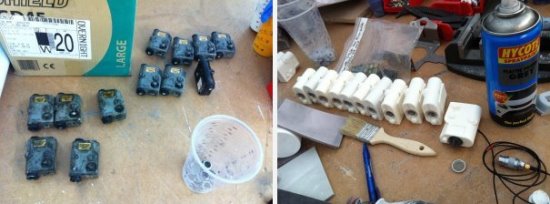
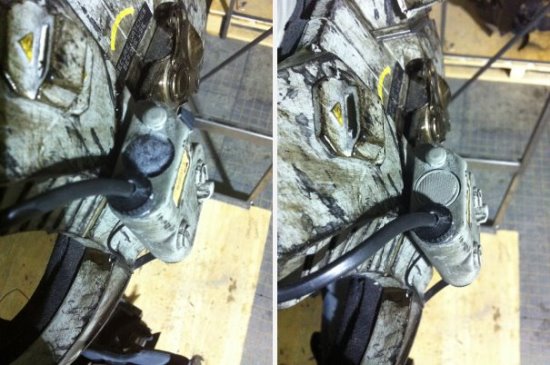
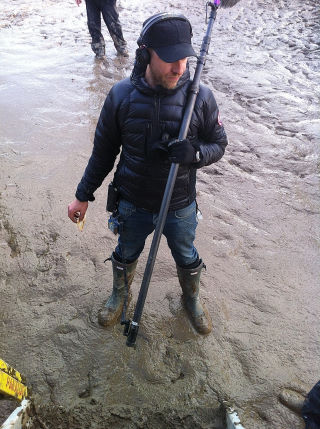
 I had told TC that I wanted to put two wireless microphones on him for this scene, one set to a high level, the other set low and in two different frequency blocks in case of any unpredictable interference on the day. He was open to this idea but wanted to test it a few days before, to see that it could be done without affecting the immaculate look of the costume. I was grateful for this as the shot was nerve-wracking enough. The cameras would be rolling from the moment the chopper appeared in the sky until they drove away in the car at the end of the scene—it had never been done before, we might get only one shot at it and we didn’t want to risk a visible sound pack spoiling the shot. We put the microphones on, mounted the packs on the ankles, and pulled and flapped the trousers to make sure we wouldn’t see any lumps in the downdraft of the helicopter blades. When TC gave the thumbs-up, we were good to go and it turned out to be a great scene. In the end there was a lot of RF around that morning that wasn’t present on the scout so it took an Xmas tree of antennae to bring in enough signal, but we got it! We all had to be in military costume in case we were seen from the air so we had to rationalise that we were in the Royal Engineers Corps and that wireless operators play a crucial role in modern warfare!
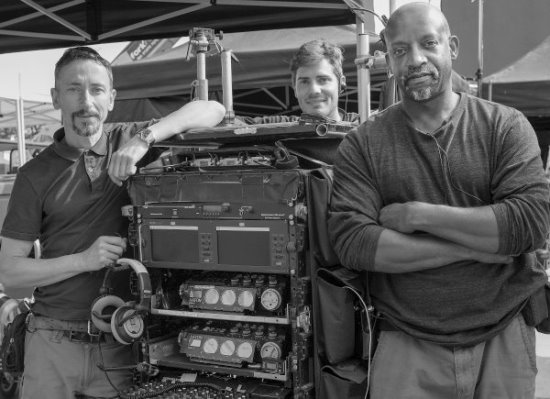
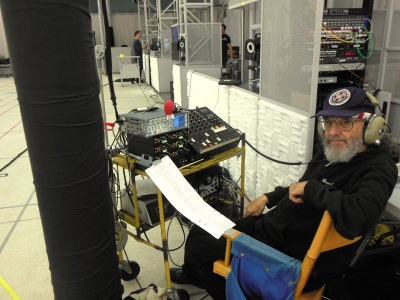 Reflective objects are verboten in or even near the volume. Any Scotchlite strips on shoes or clothing need to be taped over, and if the anodizing is worn off of the clutch knobs on your fishpole, they will need to be covered with black paper tape. Some poles’ shiny tube sections are a problem too, and black cloth tubular shrouds can be purchased to slip over the entire fishpole. J.L. Fisher has black-anodized booms available to rent for use on capture shoots. If you have work lights on your cart, be sure their light bulbs are not directly visible to any of the capture cameras.
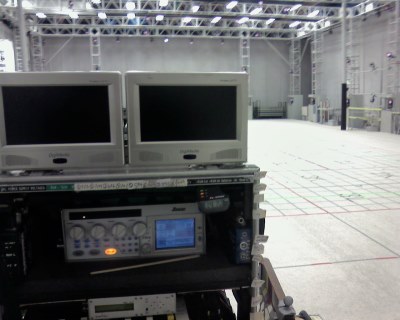 The usual recording format is mix on Channel 1, boom (if used) iso’d on Channel 2, and wireless mikes (if used) iso’d on succeeding channels. You will send a line-level feed of your mix to the IT department, where it will be distributed to the reference cameras and imported into the editing software. Your isos may also be sent into the system during production.
 Unless long cable runs are involved, this impedance mismatch usually does not cause problems. (See the cable articles for using balun transformers.) The best you can do is to use mike cables with XLR TC sources and 75 coax cables with BNC TC sources. If this does not match the TC input connector of your recorder, try a simple hard-wired adapter before going to a balun. If the recorder’s display shows a solid indication of the proper frame rate and there are no error flags, you are probably okay. If this is a long-term project, you should have time for a pre-production test, if not, cross your fingers. (Or invest $10,000 in a time-domain reflectometer to measure the jitter in the “eye pattern” and determine the stability of the TC signal at your end.)
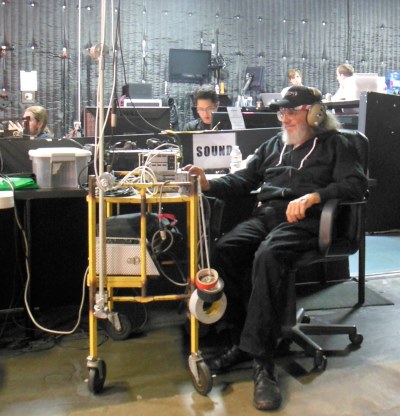 When it comes to booming a CGI–capture scene, there is good news and bad news. The good news is that you don’t have to worry about boom shadows. The bad news is:
 In addition to the usual noise problems on a live-action stage, the volume has some unique ones:
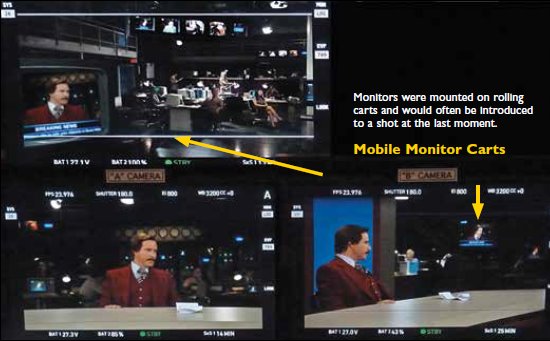
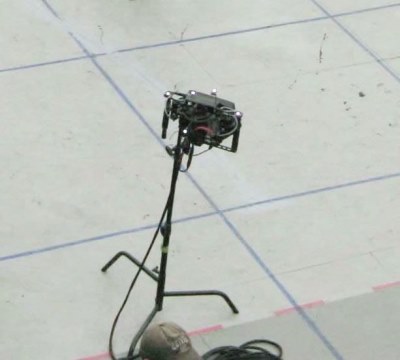 When a virtual camera is in use on a multi-day shoot, the capture days may not be contiguous. After a certain amount of capture has been done, the main crew and cast may be put on hiatus while the director wanders around the empty capture stage with the scene data being played back repeatedly. The crudely rendered video will appear in the handheld monitor, from the POV of its current position. The director can then “shoot” coverage of the scene: master, close-ups, over-the-shoulders, stacked-profile tracking shots, etc. This procedure ensures that all the angles “work.” If not, the director has two options: re-capture the scene on another day; or fix the problem in the computer by dragging characters into the desired position and/or digitally rearranging the props, set or background.
 One day in 1981, while standing in line at a bank, I struck up a conversation with an older gentleman who said he was a retired Prop Master. When I replied that I was a Boom Operator, he said that his son, Chris McLaughlin, was a Boom Operator. “Really, Chris McLaughlin is revered among boom operators. He works with Jim Webb and gets equal billing with Jim as the sound team.” The next day, I got a call from Chris. “Who are you, and why are you saying nice things about me to my pop?” We chatted a bit about mikes and booms and stuff. “What do you like,” he asked? “A Schoeps is my favorite.” “We use an 815 on everything. We did All the Presidents’ Men with one 815 underneath and won an Oscar.” You had to be spot-on with an 815 or it would sound funky; if you could handle one all the time you were a real Boom Operator.