Step-by-Step Application Guide

A Part 74 FCC license may be obtained by any US citizen intending to operate within the US and its territories for a fee, currently $170. Filling out the application form is fairly complex and it must be letter perfect in order to be processed by the FCC.
Two possible ways to get a license are to:
- PAY A PROFESSIONAL TO FILE THE APPLICATION FOR YOU
Bill Ruck, a Broadcast Engineer in San Francisco who holds Broadcast Auxiliary Low Power Radio Station Authorization WQMP992 and an FCC General Radiotelephone License, has been a valued contributor to this FCC License Project, and can prepare the application for you for a fee of about $100 plus the filing fee, which is currently $170. Bill is extremely knowledgeable about the application procedure and his services are highly recommended. Contact Bill at 415-564-1450 or billruck@earthlink.net
- DO IT YOURSELF BY FOLLOWING THE STEP-BY-STEP INSTRUCTIONS BELOW
The instructions below should be sufficient for individuals who fit the most common profile of sound professionals in the motion picture and television industry. The scope of the license geographically covers the entire United States and its possessions, and includes all the bands allowed for licensed wireless microphone use.
As the bands used for UHF DTV stations and Public Safety can vary slightly from one locale to another, it is the responsibility of the license holder to know and respect local allocations.
The guidance presented here is offered as a convenience to you but because circumstances vary and FCC rules change, we cannot guarantee that your application will be approved.
STEP-BY-STEP INSTRUCTIONS
NOTE: Please help us make this page better. The FCC has recently redesigned the entire online application. This updated page reflects the majority of those changes but if you run into any inconsistencies, please send us your feedback so we can improve the accuracy of this page.
Part 1 – Background
The Federal Communications Commission (FCC) allots radio frequency spectrum from very low frequencies all the way through microwave frequencies. The regulations for each band of frequencies are found in the FCC Rules & Regulations, Title 47, Telecommunication. For wireless microphones and other similar applications, PART 74—EXPERIMENTAL RADIO, AUXILIARY, SPECIAL BROADCAST AND OTHER PROGRAM DISTRIBUTIONAL SERVICES, Subpart H—LOW POWER AUXILIARY STATIONS contains the regulations regarding the use of TV channels for wireless microphones.
The FCC uses Form 601 for most applications with differing schedules depending on the exact radio service. Most applications today, including Part 74 Subpart H, must be done on-line with the FCC’s Universal Licensing System.
Before you Begin…
• The FCC’s website is most compatible with modern HTML 5 browsers.
• The online application applies error-checking as you move from page to page, bringing certain types of errors to your attention. The website will check for errors before you submit the application at the end of the process but it will not find mis-spelled information or wrong telephone numbers.
• As you progress through the online application, remember that the data you enter is all just a “work in progress” until you’re finally at the end of the process and ready to hit the SUBMIT button, sending the full application to the FCC. Use the Application Sections box to navigate from page to page but DO NOT click SUBMIT until you’re really done with all the pages. Before you do submit it, you’ll have a chance to review the completed application by clicking on Review Application in the upper right-hand corner. When you’ve submitted the application and the verification then click on Review Application to get a .pdf and then Print/Save a PDF for your records.
• The online application can take about an hour to complete. You must finish before 12 midnight Eastern Time because the FCC’s online filing system is down for regular system maintenance daily between 12 midnight and 2:00 a.m. Eastern Time (ET). You won’t be able to work on your application during those hours.
• If you don’t finish in one session, the FCC website retains your application for 30 days. If you need to stop working, click on Quit Application in the upper right-hand corner. You can resume working on it during that time if you login to the FCC site, find My Applications, and then over on the right side where it says Work on this Application, click Continue.
• The FCC offers limited help on their Support Services page at: http://esupport.fcc.gov/index.htm?job=getting_connected.
• You will need to prepare a Statement of Eligibility. The statement needs to state either Television Program Producer or Motion Picture Producer consistent with the application. The statement needs to be signed (with the “/S/” and your name) and dated. It is recommended that the statement be filed as a PDF. Copy and paste the text from one of the 2 templates below to create the Word doc and then save as a PDF.
TPP T Statement of Eligibility (Television Program Producer)
Statement of Eligibility
[NAME]
The applicant is a television program producer (TPP) engaged in the production of television programs as defined in §74.801. The equipment to be licensed will be used for the transmission of cues and orders to production personnel and participants in programs and the preparation therefore, the transmission of program material by means of a wireless microphone worn by a performer and other participants in a program during rehearsal and during the actual filming, recording, or broadcast.
The applicant works on a contract basis for producers and is sent wherever they need throughout the United States of America.
The applicant will avoid using frequencies in cities as listed in §90.303.
/s/
[NAME]
[DATE]
MPP T Statement of Eligibility (Motion Picture Producer)
Statement of Eligibility
[NAME]
The applicant is a motion picture producer engaged in the production of motion pictures as defined in §74.801. The equipment to be licensed will be used for the transmission of cues and orders to production personnel and participants in programs and the preparation therefore, the transmission of program material by means of a wireless microphone worn by a performer and other participants in a program during rehearsal and during the actual filming, or recording.
The applicant works on a contract basis for producers and is sent wherever they need throughout the United States of America.
The applicant will avoid using frequencies in cities as listed in §90.303.
/s/
[NAME]
[DATE]
• The FCC in Report and Order FCC 20-126 eliminated the option of sending a paper copy of your license to you. “By this Report and Order, the Commission adopts rules mandating electronic delivery for all ULS and ASR compulsory and courtesy correspondence and eliminating the ability to request the Commission to mail hard copies of authorization and letters.”
For that reason, a valid and working email is now required even though the form says “Optional”.
Now on the ULS sign page there is a banner stating “Applicants are strongly encouraged to provide an email address on their license application(s), which will trigger the electronic issuance of an official copy of their license(s) to the email provided upon application grant. Per the timing specified in Rulemaking FCC 20-126, the FCC will no longer print, and Licensees will no longer be able to request, hard copy license authorizations sent by mail. “
Part 2 – Getting Your FCC Registration Number
If you don’t already have an FCC Registration Number (FRN), you need to get one. This allows the FCC to isolate your Social Security number from FCC records and will be necessary for any communications you have with the FCC in the future. An individual can only be assigned one and only one FRN. To get an FRN . . .
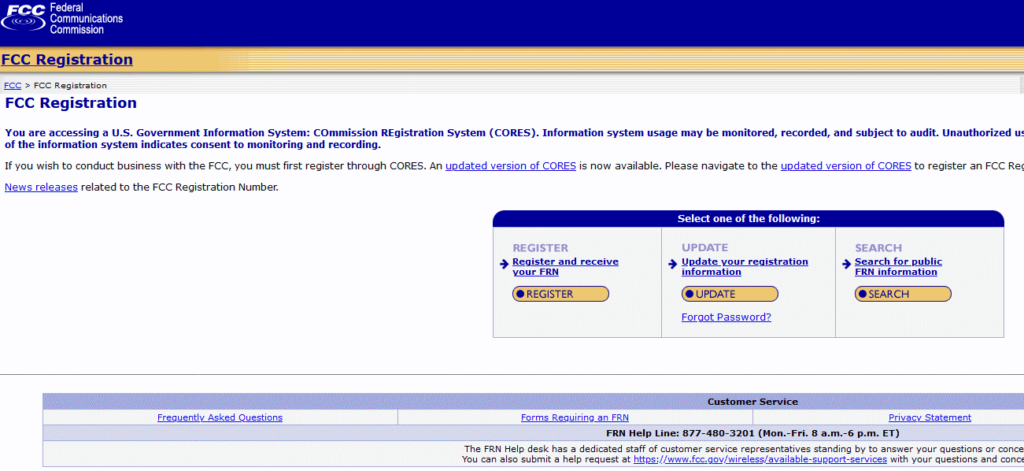
1. Go here http://wireless.fcc.gov/uls/index.htm?job=home
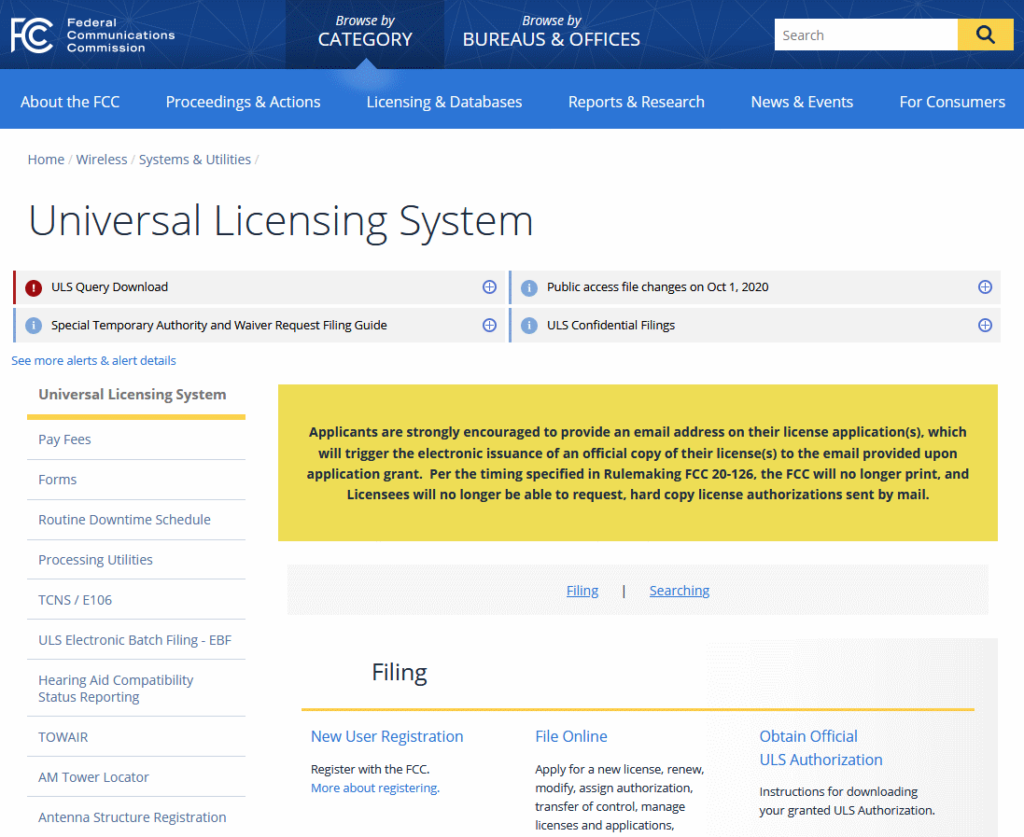
2. Click New User Registration
3. Click Register.
4. Select Registration Type “An Individual” and contact address in the US YES.
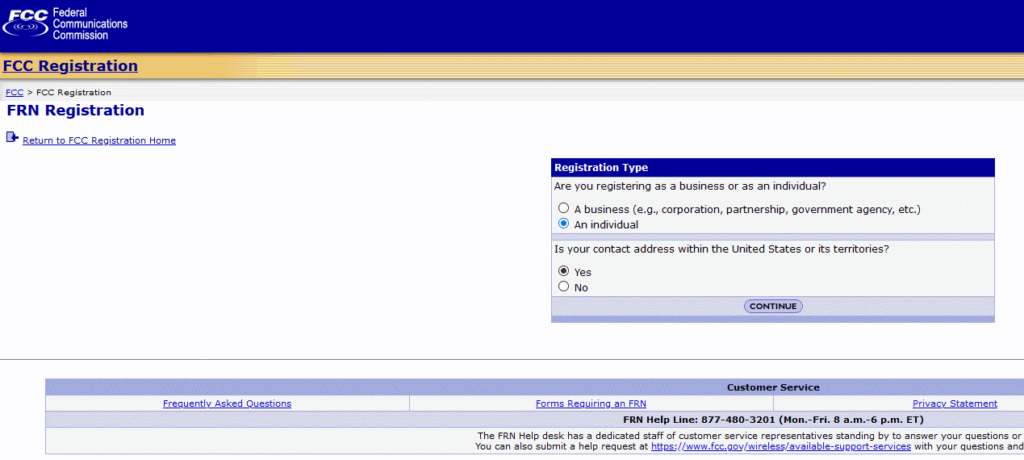
5. Click on CONTINUE and fill in your name and contact info and choose a password and a Personal Security Question.
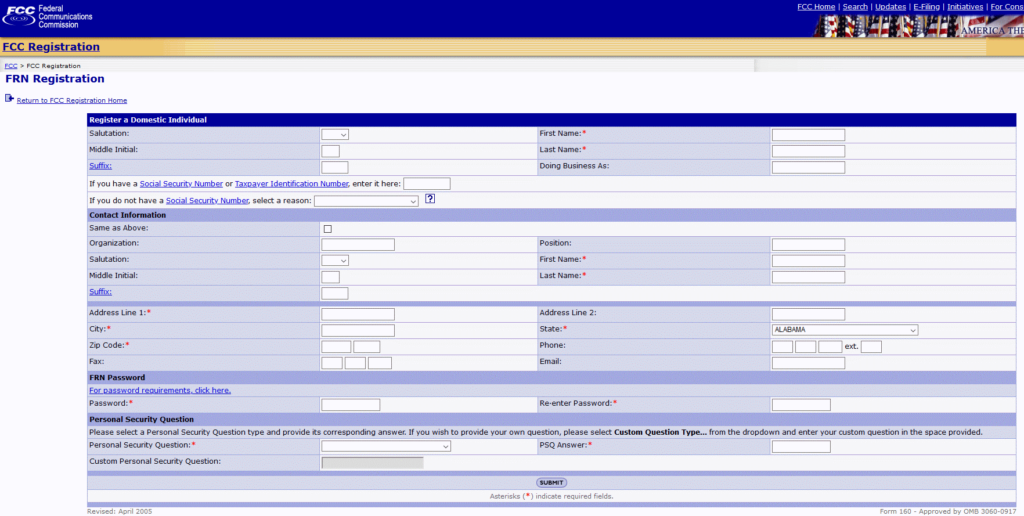
6. Write down the password and the Personal Security Question someplace safe.
7. After you submit the form, they’ll give you your FRN. Write the FRN someplace safe.
8. Application for the FRN may not be processed immediately upon application. It may take a few days before you may proceed with the rest of the licensing process.
Part 3 – Instructions on how to complete the FCC Form 601 on-line
Go to http://wireless.fcc.gov/uls/index.htm?job=home
1. Select Online Filing – Log In and then log in using your FRN and password. Note: You must enter all 10 digits of your FRN including leading zeros.
2. You will get the My Licenses page. On the left, select Apply for a New License.
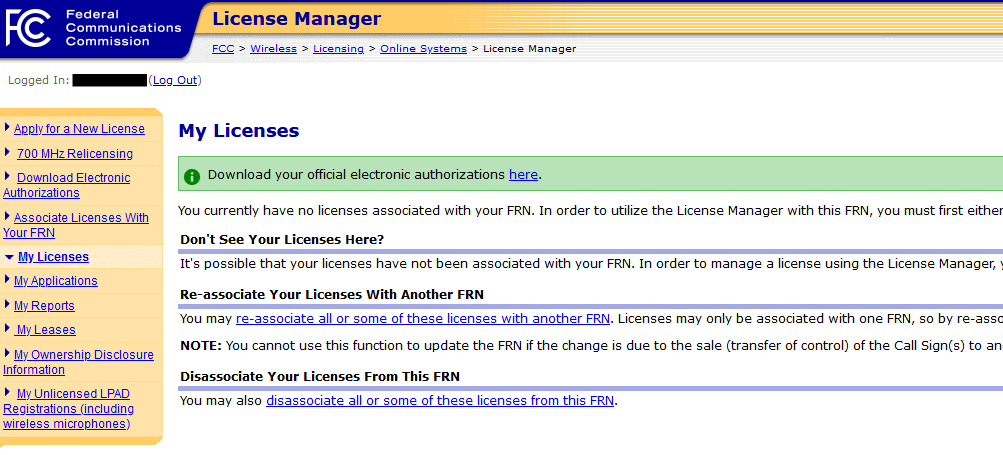
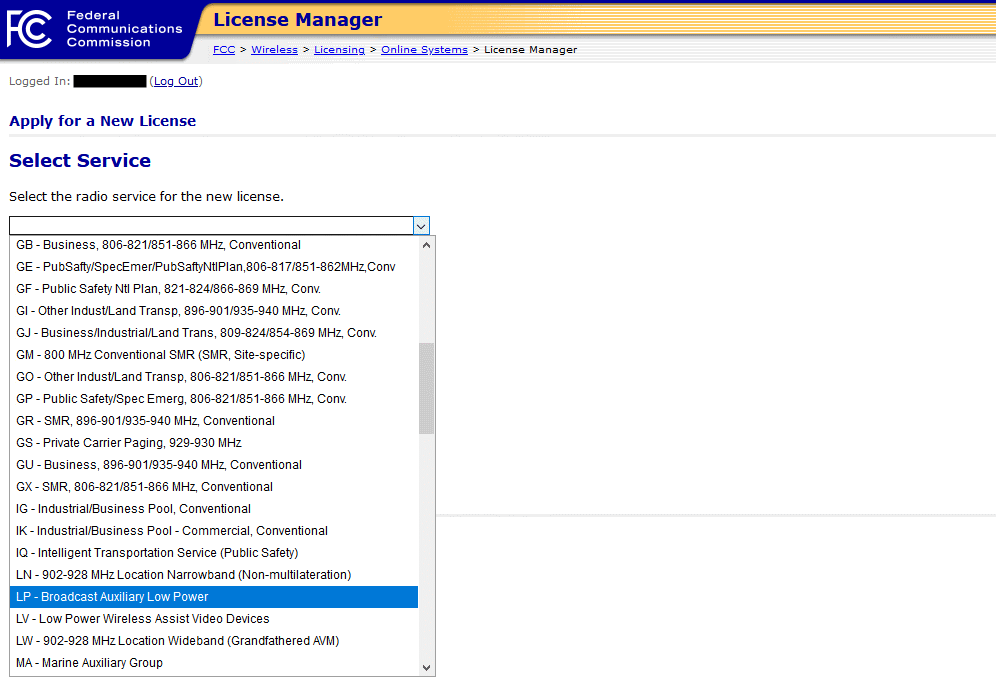
3. Where it asks you to Select the Radio Service for the new license, choose LP – Broadcast Auxiliary Low Power from the dropdown list and then click Continue.
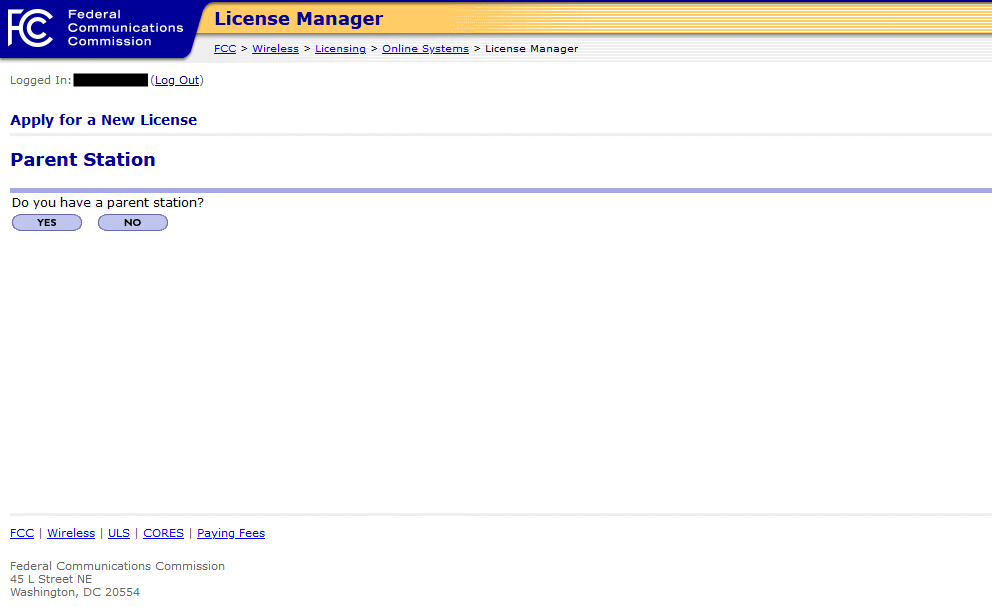
4. When it asks if you have a Parent Station, select NO.
5. If all went well, the next thing you’ll see is the APPLICATION INFORMATION page.
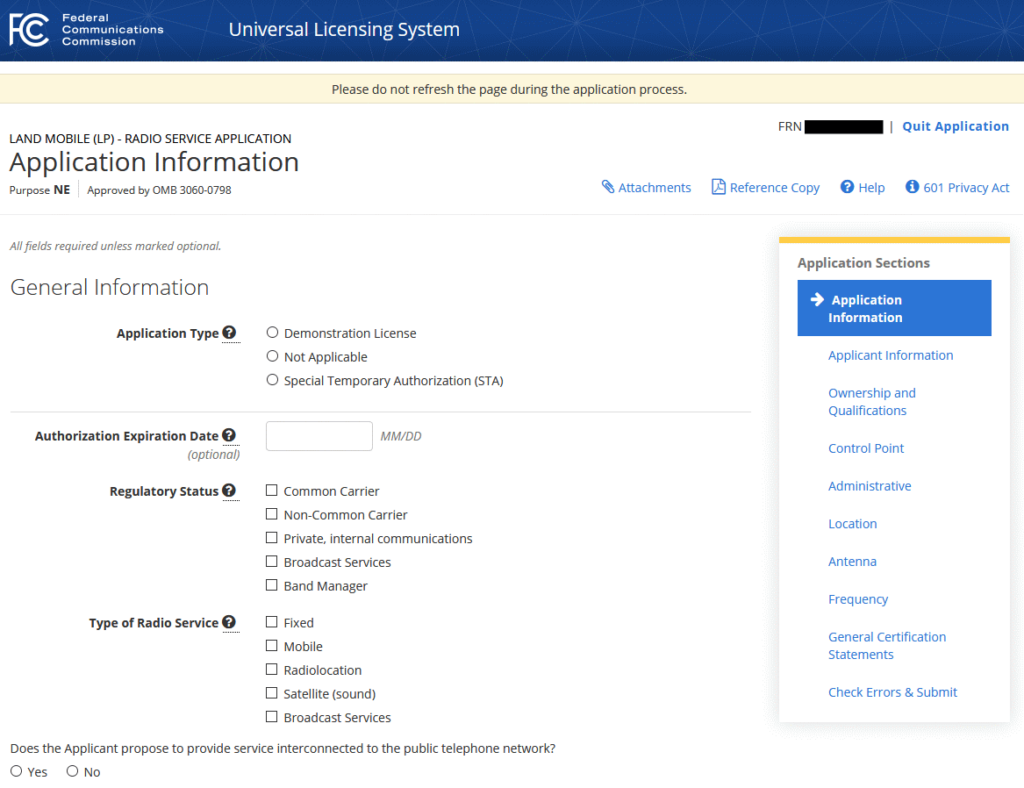
6. Beneath where it says Purpose NE (NE for New), the first paragraph of text Application Type, select N (for “Not Applicable”).
7. Where it says Regulatory Status, select Private, internal communications.
8. Where it says Type of Radio Service, select Mobile.
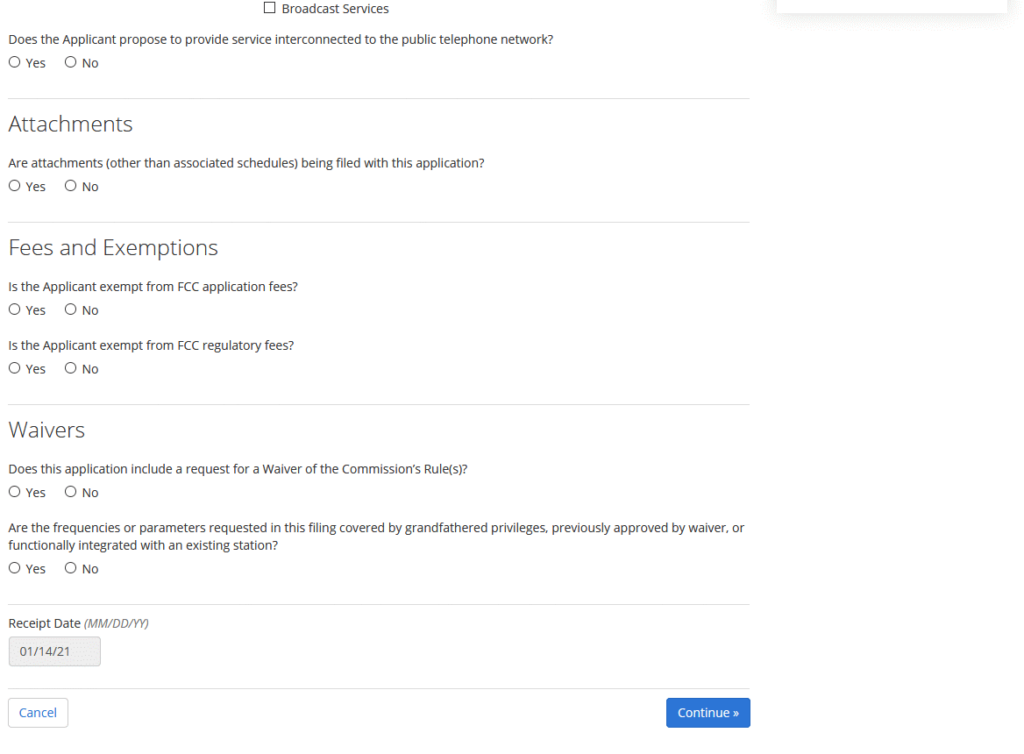
9. Where it says Does the applicant propose to provide service interconnected to the public telephone network?,select NO.
10. Where it says Attachments, Are attachments being filed with this application?, select YES.
11. Under Fees and Exemptions, where it says Is the applicant exempt from FCC application fees?, select NO.
12. Under Fees and Exemptions, where it says Is the applicant exempt from FCC regulatory fees?, select NO.
13. Under Waivers, Does this application include a request for Waiver of the Commission’s rules?, select NO.
14. Under Waivers, Are the frequencies covered by grandfathered privileges?, select NO.
15. At the bottom, click Continue to be taken to the Applicant Information page.
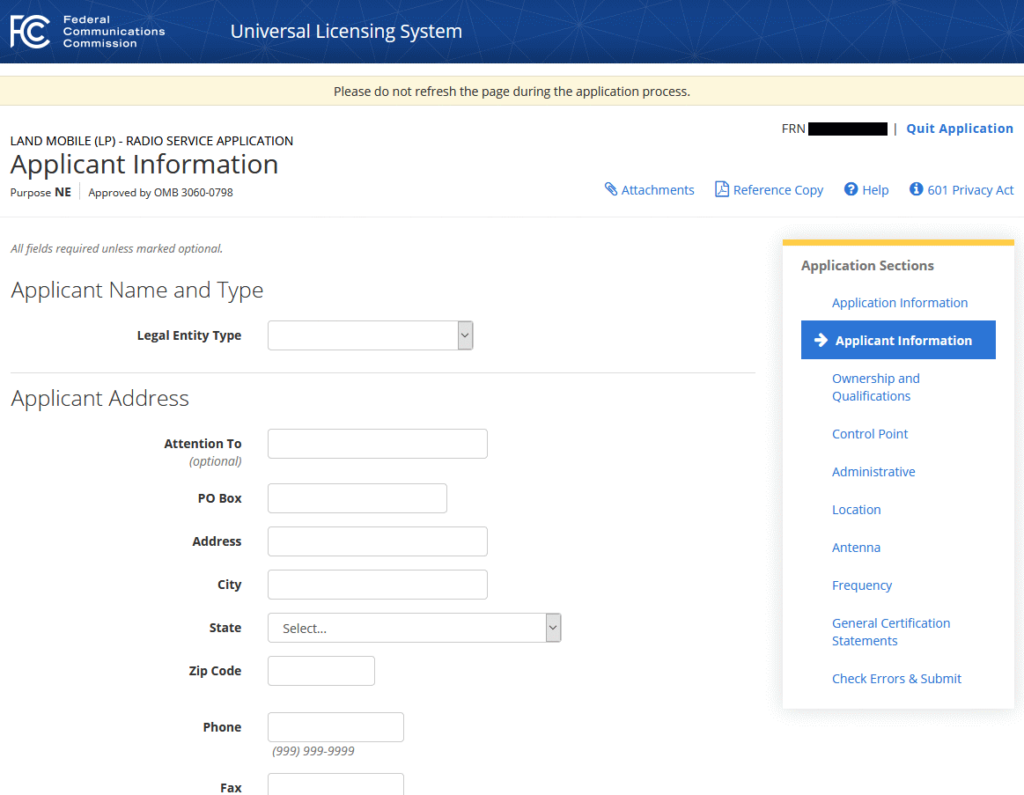
16. Under Applicant Name and Type, Legal Entity Type, you probably want to select Individual or perhaps Corporation or maybe one of the other choices but avoid Other because it will require explanation.
17. Now enter First Name, Middle Initial (optional), Last Name, and Suffix (optional) for an individual. For a corporation enter the name of the corporation but leave the name fields blank.
18. Under Applicant Address enter Attention To as appropriate (e.g., as an individual use your name).
19. Enter PO Box or street Address as appropriate. Enter City, State (two letter abbreviation), and Zip Code as appropriate.
20. Enter Phone and Fax (optional) number as appropriate.
21. Although the form says “optional” the FCC really does all of its busines these days by email so under Email enter your email address.
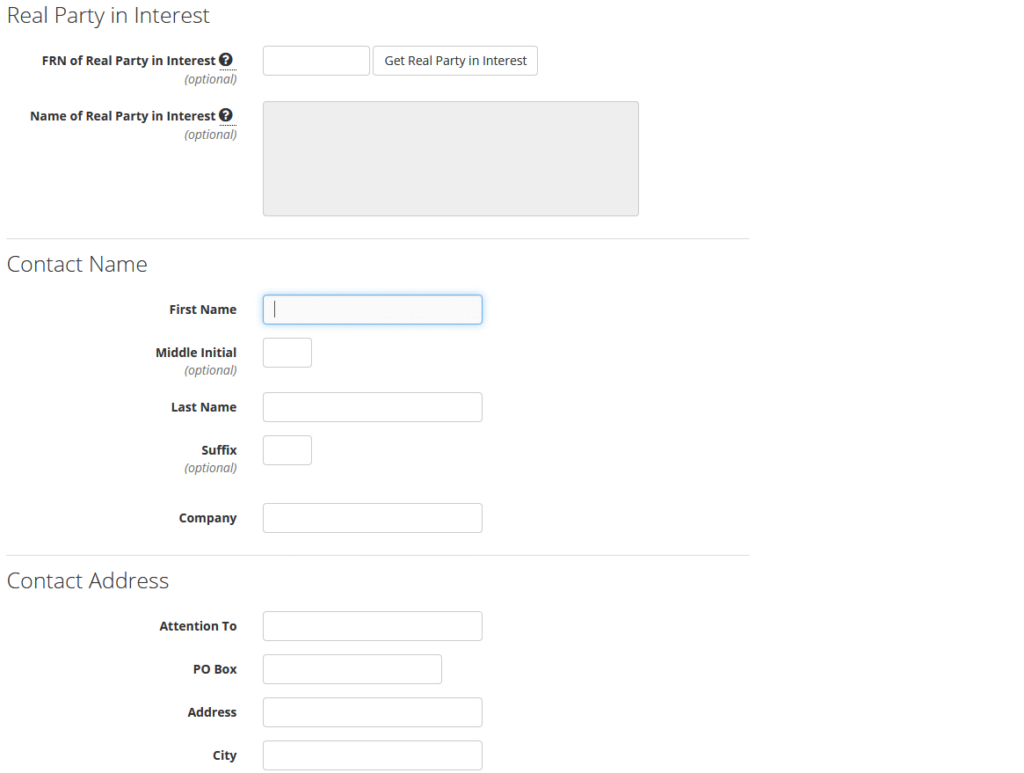
22. Tab past Real Party in Interest, it is not appropriate for you. Leave blank.
23. Enter the same information as above for Contact Information.
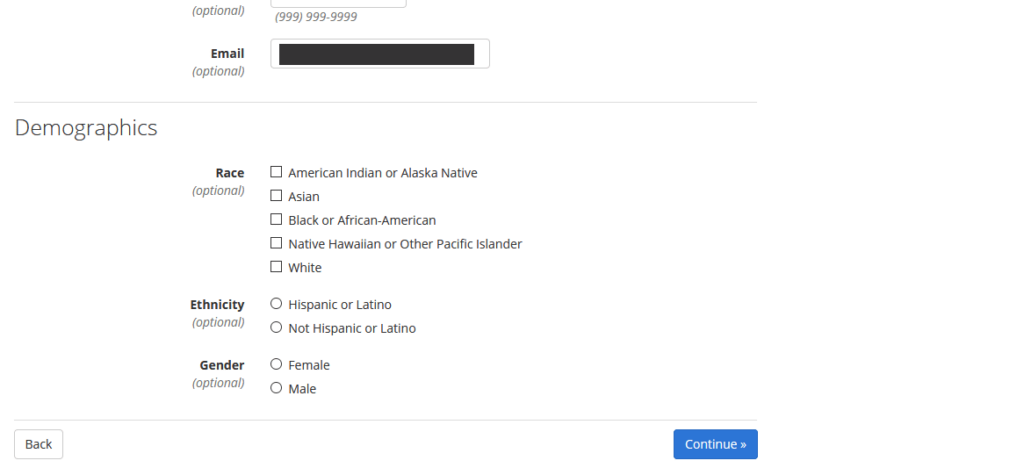
24. Demographic information is optional.
25. At the bottom, click Continue to be taken to the Ownership and Qualifications page.
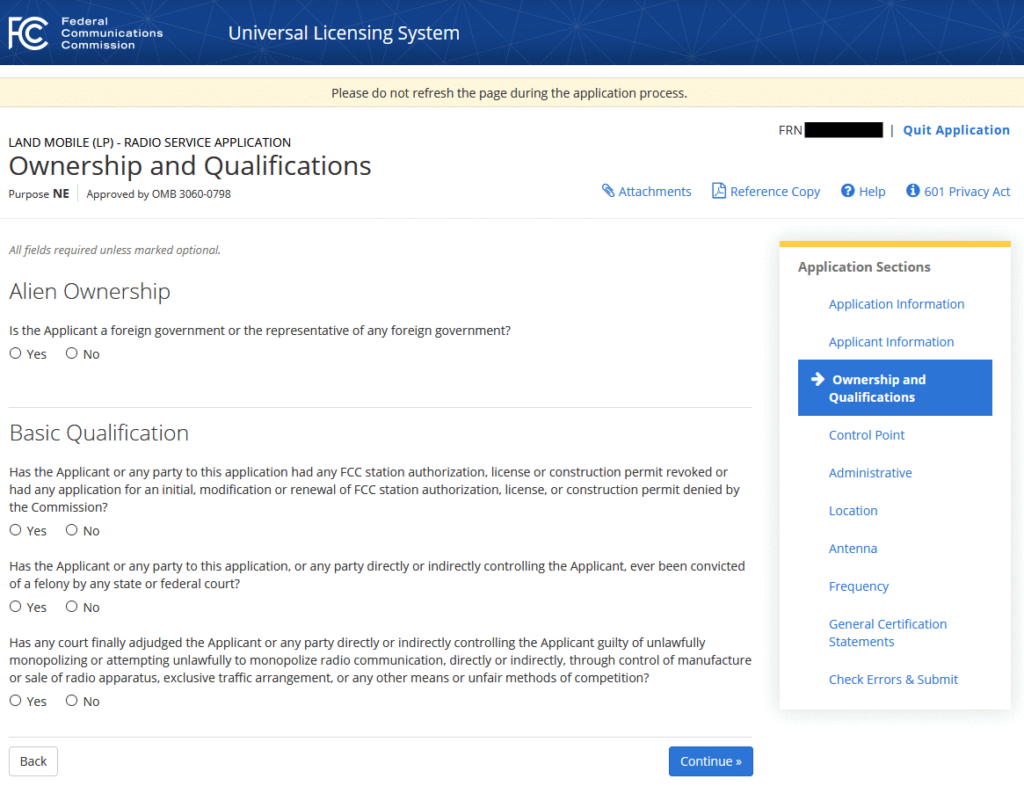
26. On this page, it is best to be able to say NO to all questions but if you do need to answer YES to any of them, you’ll need to do your own research and contact a communications lawyer for advice before proceeding.
27. At the bottom, click Continue to be taken to the Control Point page.
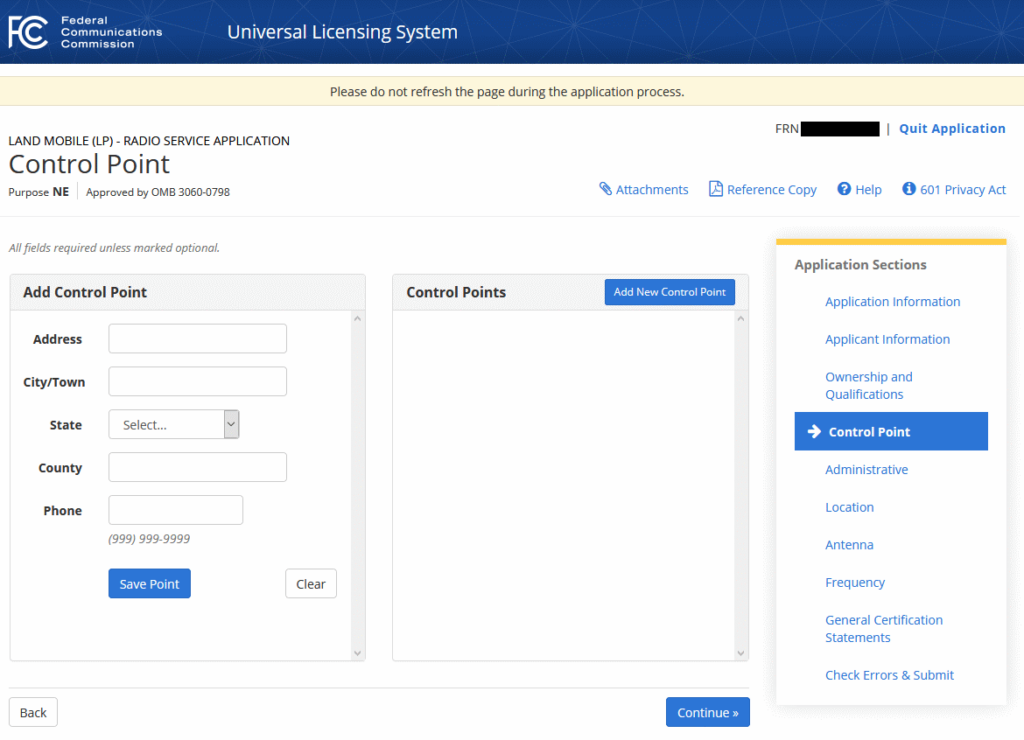
28. The Control Point refers to the location where the FCC can contact you if interference is reported. Click on Add New Control Point and then enter your info, probably your home address and telephone number, and be sure to enter the County. Then click on Save Point.
The information you entered will move to the right side. You must have at least one Control Point but you can click Add if you wish to add more.
29. Click on Continue to be taken to the Administrative page.
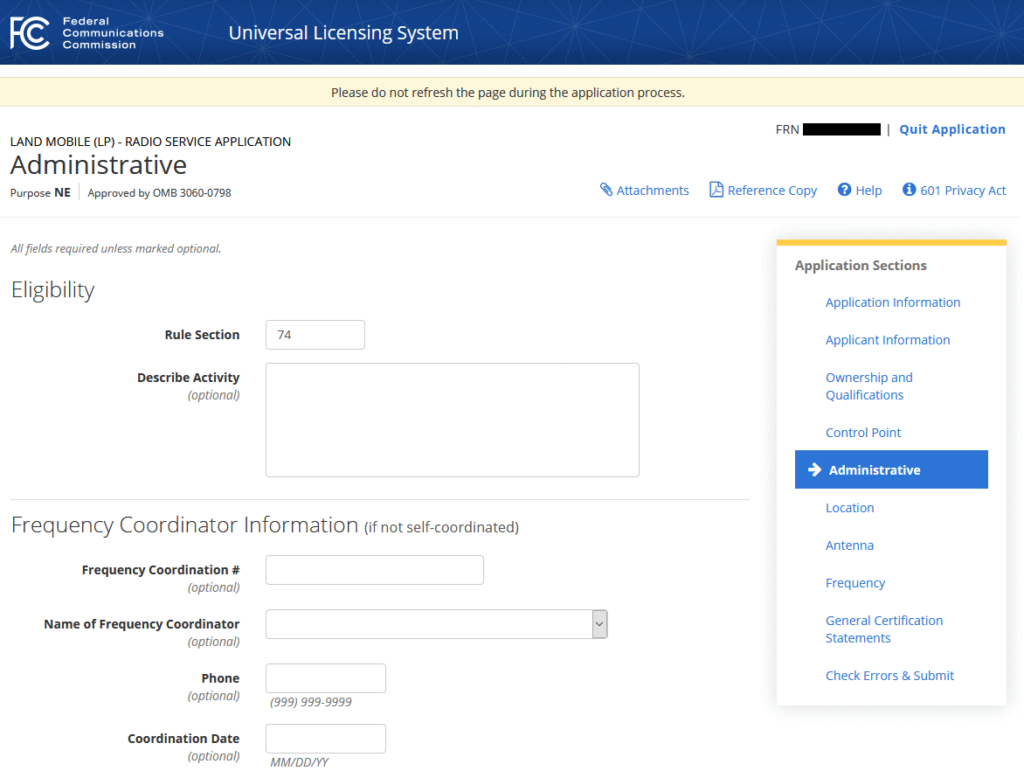
30. Under Eligibility, where it says Rule Section, enter “74.832(A)”.
31. Where it says Describe Activity, enter Applicant is a TPP as defined in 74.801 into the box. Note: TPP stands for Television Program Producer. Alternatively, you could enter MPP, for Motion Picture Producer. Use whichever designation is most common to the work you do. If your work is 50-50, pick either one… it won’t matter which as both are equally eligible.
There are special eligible users: large venue owners or operators and professional sound companies. If you are either there are specific requirements that must be met and are not part of these instructions.
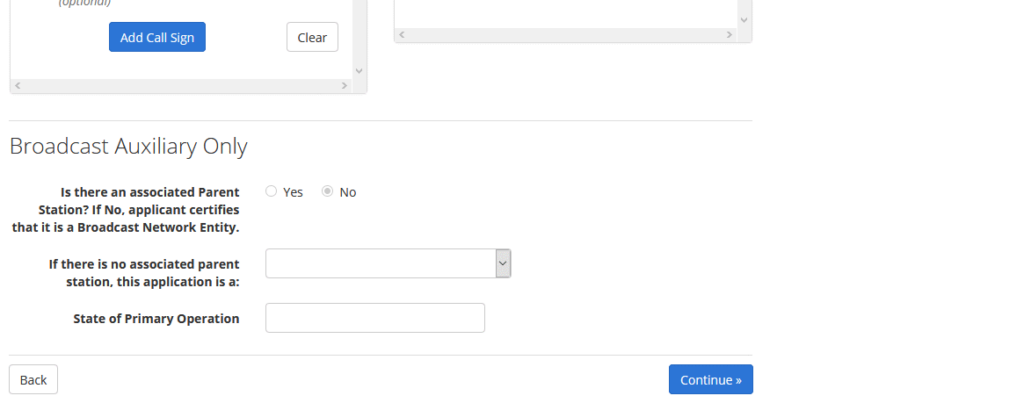
32. Skip the middle section of the page and move down to Broadcast Auxiliary Only. Where it says If there is no associated parent station, this application is a, choose either Motion Picture Producer or Television Producer, as per the choice you made in the previous step regarding MPP and TPP. Enter your State of Primary Operations.
33. At the bottom, click Continue to be taken to the Location List page.
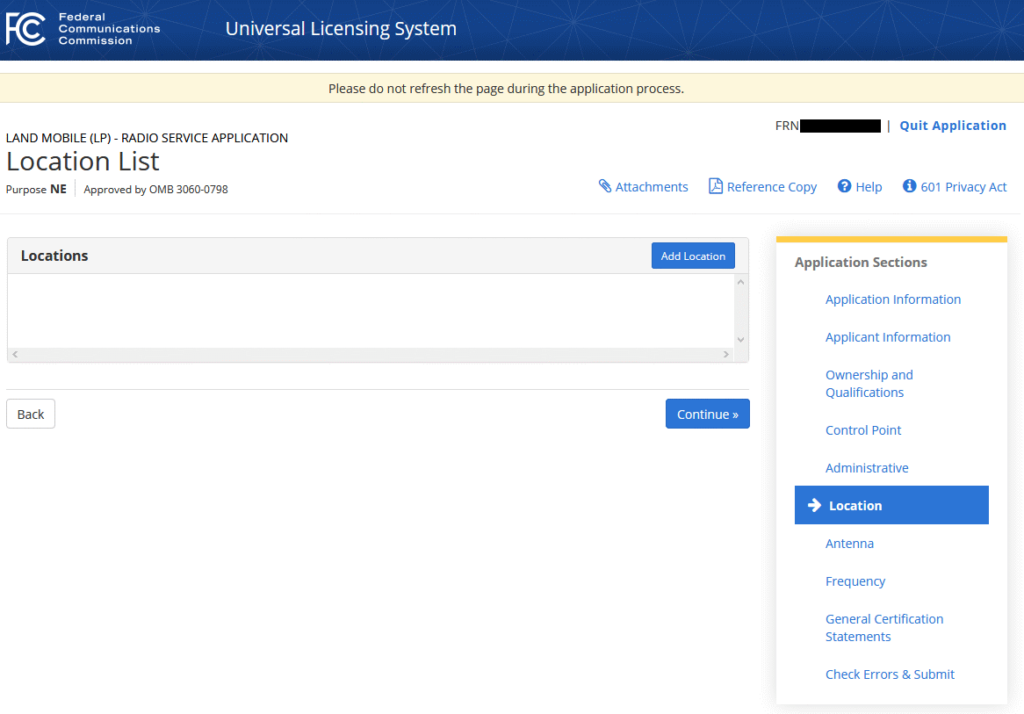
34. To the right of where it says Locations, click Add Location.
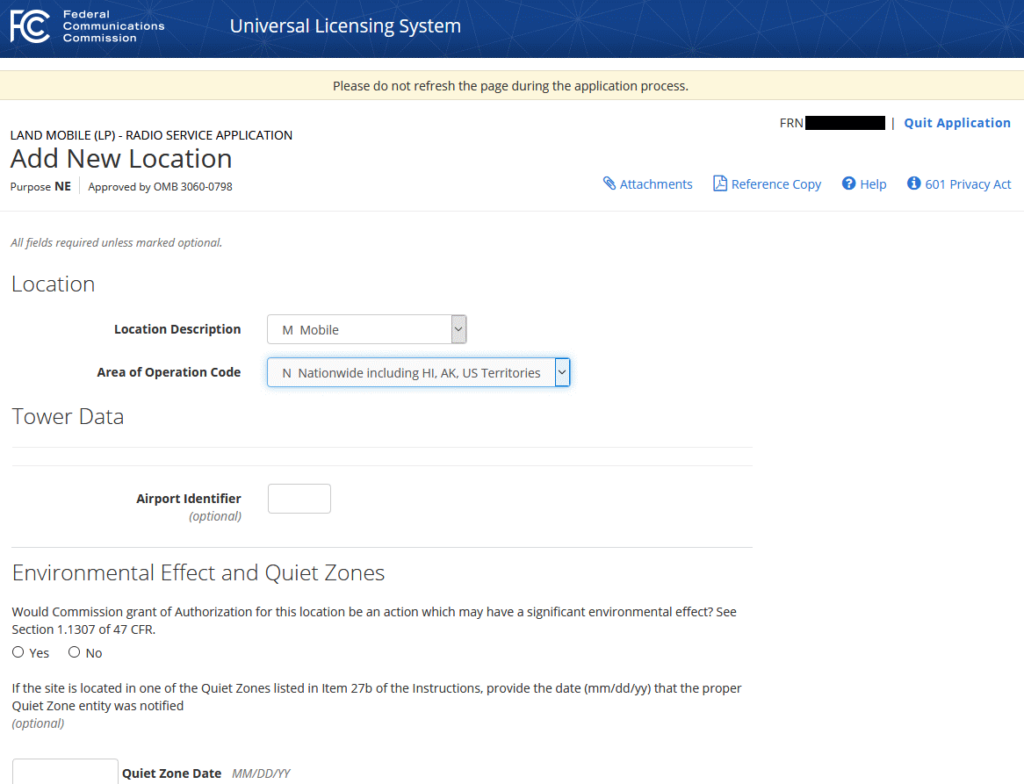
35. Open the drop-down list beneath Location Description and select M Mobile.
36. Open the drop-down list beneath Area of Operation Code and select N Nationwide including HI, AK, US Territories.
37. Skip down to the bottom of the page. Where it says Would a Commission grant of Authorization for this location be an action which may have significant environmental effect?, select NO.
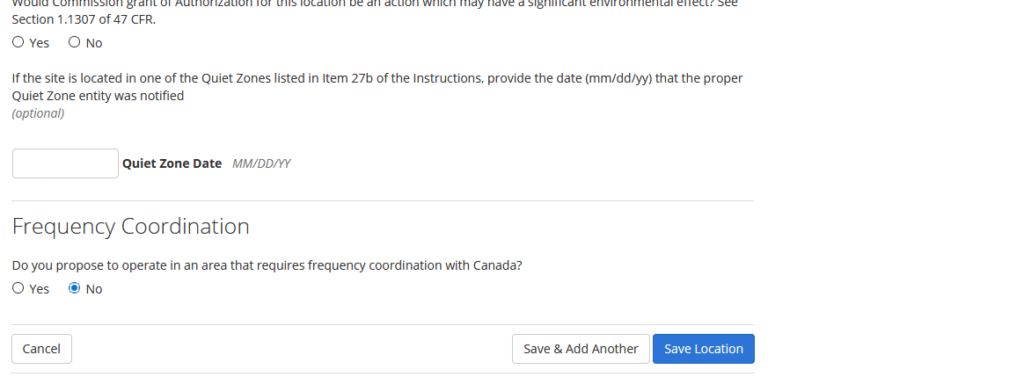
38. Where it says Do you propose to operate in an area that requires frequency coordination with Canada?, you can most likely say NO. If you respond YES then the whole process stops until Canada reviews the application.
39. At the bottom right of this page, click the Save Location button. It should now indicate that you’ve chosen “Mobile Nationwide” in the box.
40. Now you’re going to add a second location so once again, to the right of where it says Locations, click Add Location.
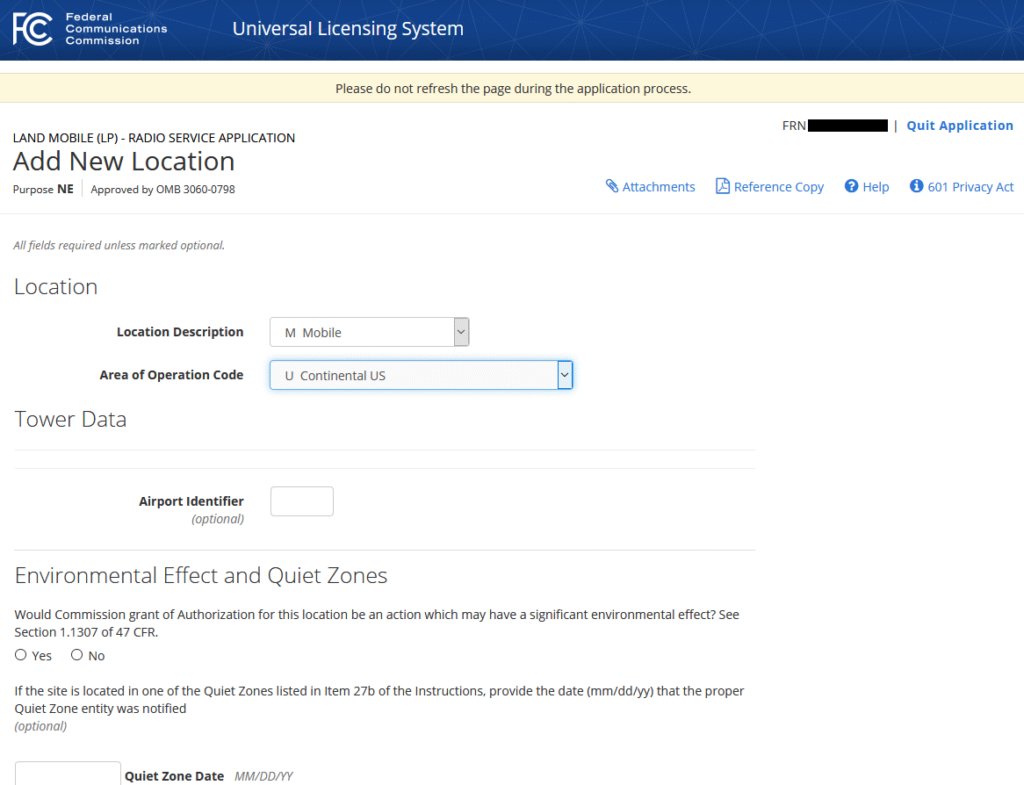
41. Open the drop-down list beneath Location Description and select M Mobile.
42. Open the drop-down list beneath Area of Operation Code and this time select U Continental US.
43. Skip down to the bottom of the page. Where it says Would a Commission grant of Authorization for this location be an action which may have significant environmental effect?, select NO.
44. Where it says Do you propose to operate in an area that requires frequency coordination with Canada?, you can most likely say NO.

45. At the lower right of this page, click the Save Location button. It should now show both of your locations in the box. You have the option to Edit or Delete if desired.
46. At the bottom, click Continue to be taken to the Antenna page.
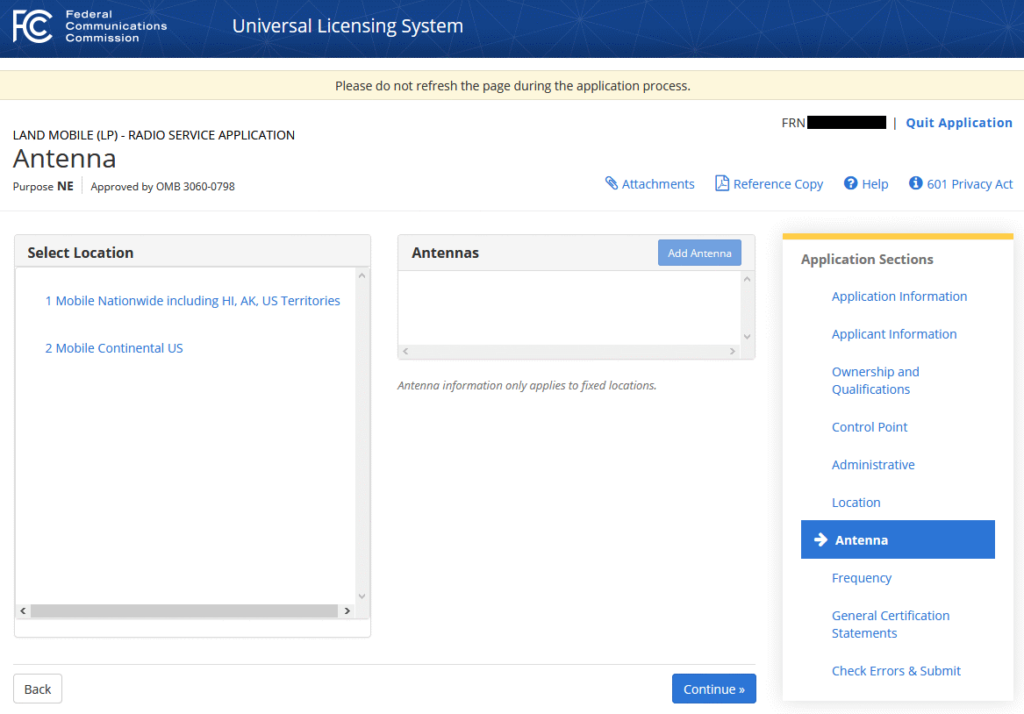
47. You will see the two locations that you created but for Mobile locations you do not need to do anything on the Antenna page so click on Continue to go to the Frequency List Page.
48. Things get a little tricky here so read this step in its entirety before proceeding. In order to be licensed and prepared to use all possible equipment, even if you don’t currently own it, you’re going to enter data for all frequency ranges needed to cover audio RF gear likely to be used for Film and TV production that can be licensed in Part 74. The frequency ranges are arbitrary FCC categories that do not correspond to any wireless microphone manufacturer’s “range” or “block”.
The process is convoluted but straightforward.
The Number of Units is suggested; some applicants have more so please adjust the number to fit your wireless use. A license applies to transmitters in use and not on a shelf. You could have 1,000 transmitters on the shelf and they do not need to be licensed.
The two tables show all of the UHF frequencies for Part 74 Low Power Broadcast Auxiliary Services. The catch is that you agreed to follow the list in FCC Rule 90.303 in the sample Statement of Eligibility. In some cities some TV channels are assigned to Land Mobile and MAY NOT be used for Low Power Auxiliary use. A copy of that rule section is here.
Location Number 1; Antenna Number 1
| Lower or Center Frequency (MHz) | Upper Frequency (MHz) | Station Class | Number of Units | Output Power (watts) | ERP (watts) | Emission Designator |
| 54 | 72 | MO | 10 | 0.05 | 0.05 | 200KF3E |
| 76 | 88 | MO | 10 | 0.05 | 0.05 | 200KF3E |
| 174 | 216 | MO | 10 | 0.05 | 0.05 | 200KF3E |
| 470 | 488 | MO | 25 | 0.25 | 0.25 | 200KF3E |
| 494 | 608 | MO | 25 | 0.25 | 0.25 | 200KF3E |
| 653 | 657 | MO | 25 | 0.02 | 0.02 | 200KF3E |
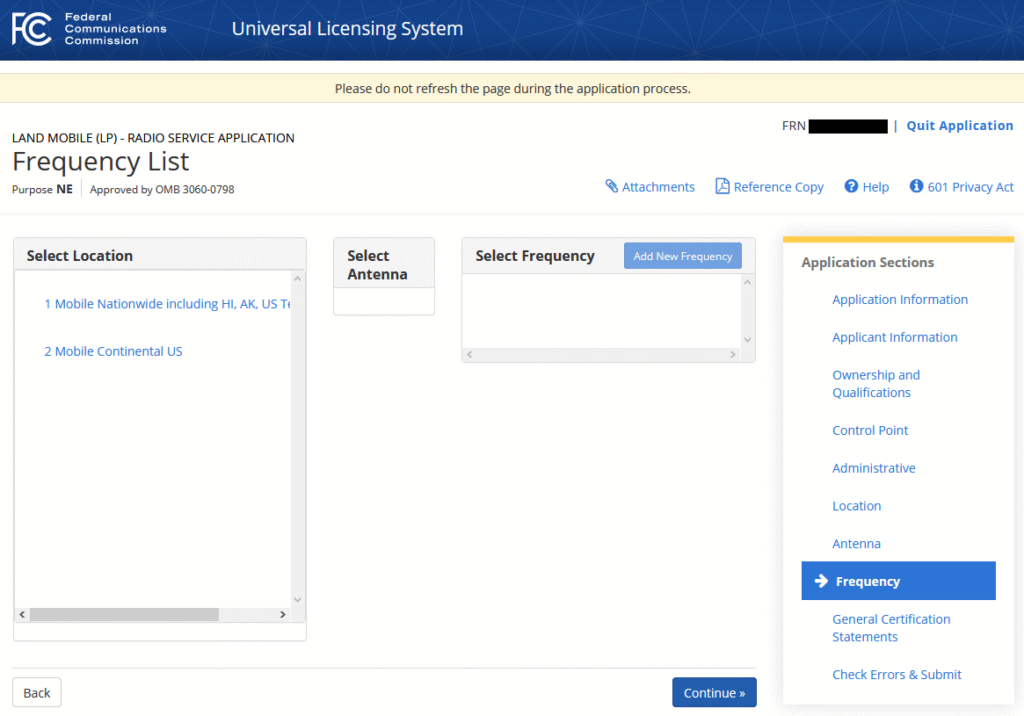
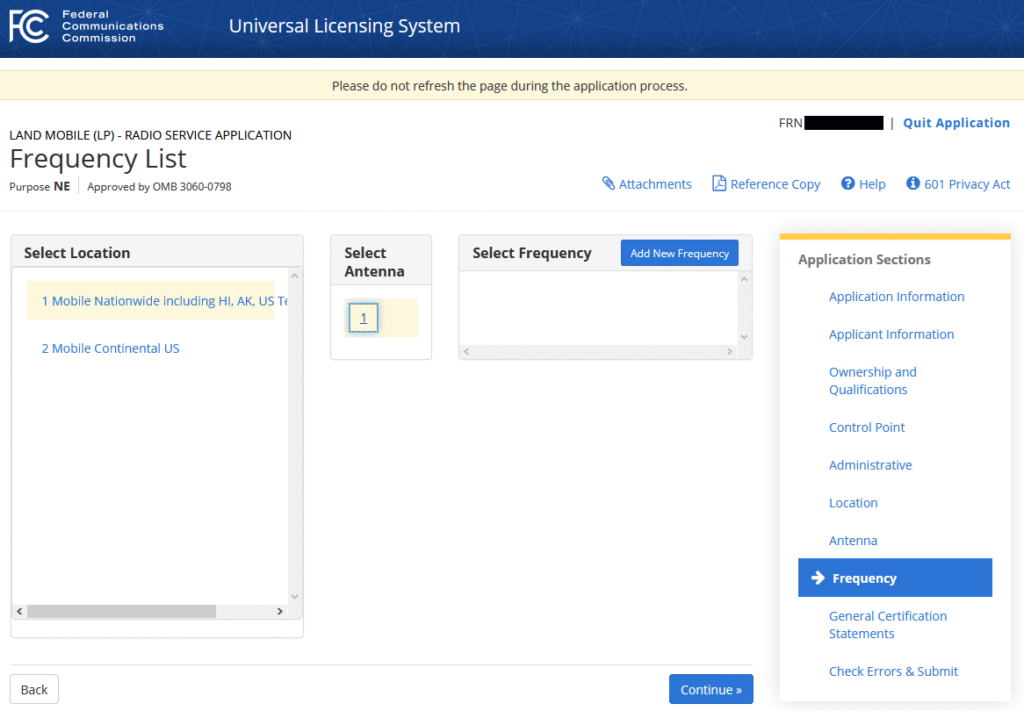
49. On the Frequency List page under Select Location click on the first location, 1 Mobile Nationwide including HI, AK, US Territories, click on Select Antenna 1, click on Add New Frequency.
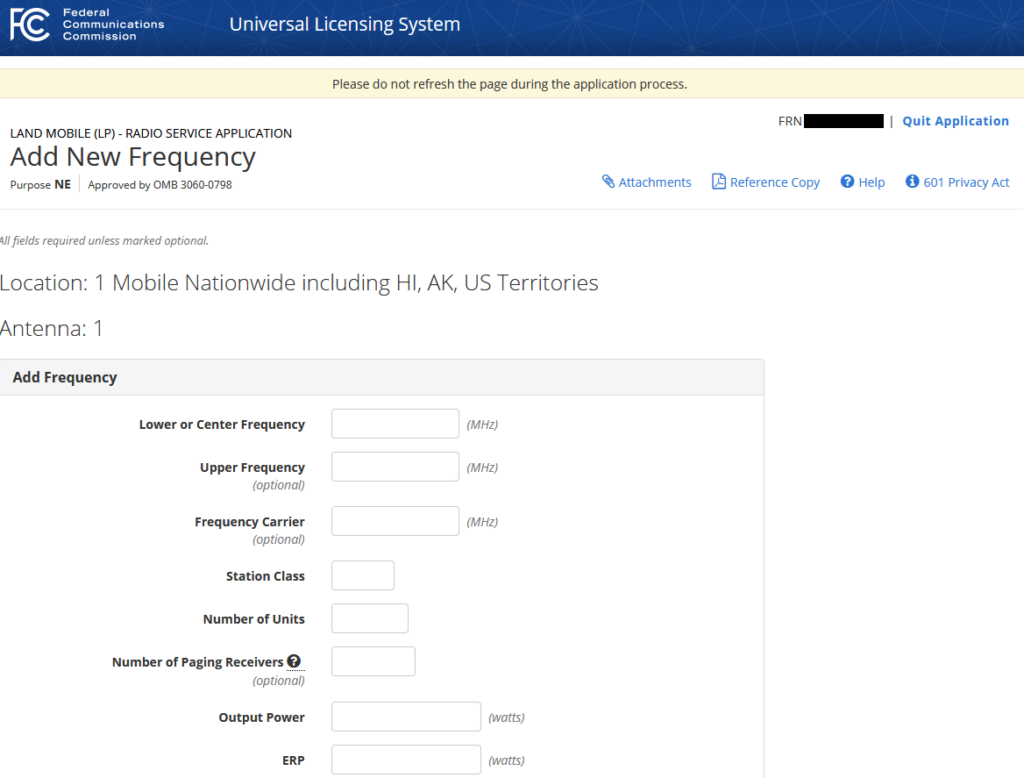
50. Enter Lower or Center Frequency; Upper Frequency; Station Class (MO); Number of Units; Output Power; and ERP from the first row in the first table. Leave Frequency Carrier and Number of Paging Receivers blank; those fields do not apply to this application. Click on Save & Add Another and then enter Lower or Center Frequency; Upper Frequency; Station Class; Number of Units; Output Power; and ERP from the second row in the first table. Then click on Save & Add Another. Repeat until you have entered the last row from the table and then click on Save Frequency.
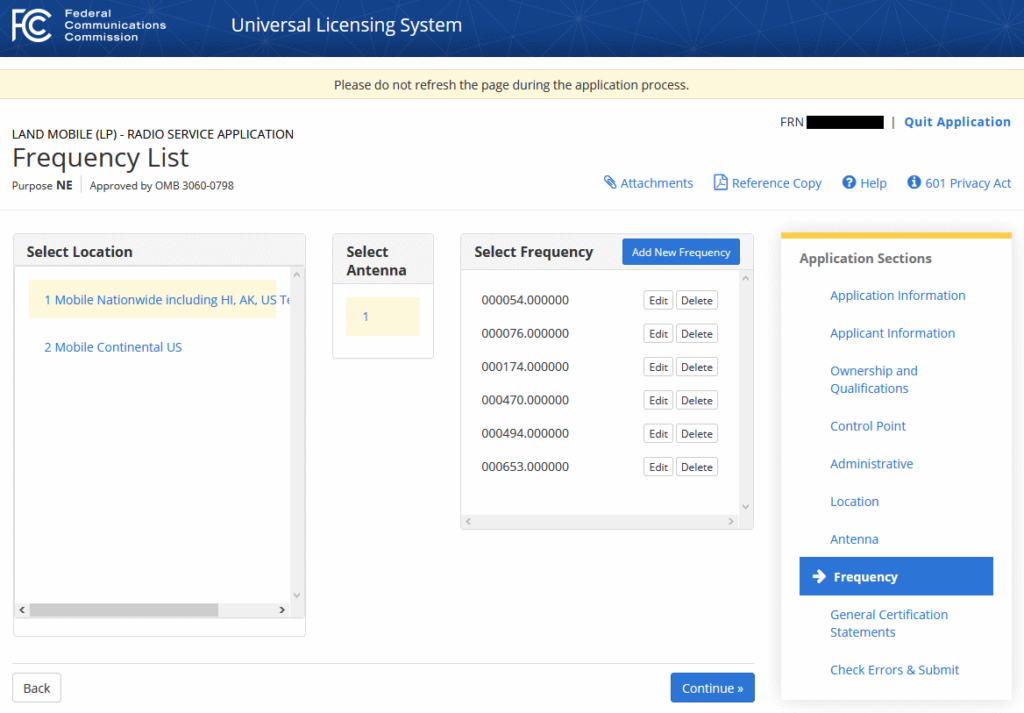
51. Now you need to enter the Emission Designator. On the Select Frequency box first entry click on Edit and that will bring you to the Edit Frequency page.
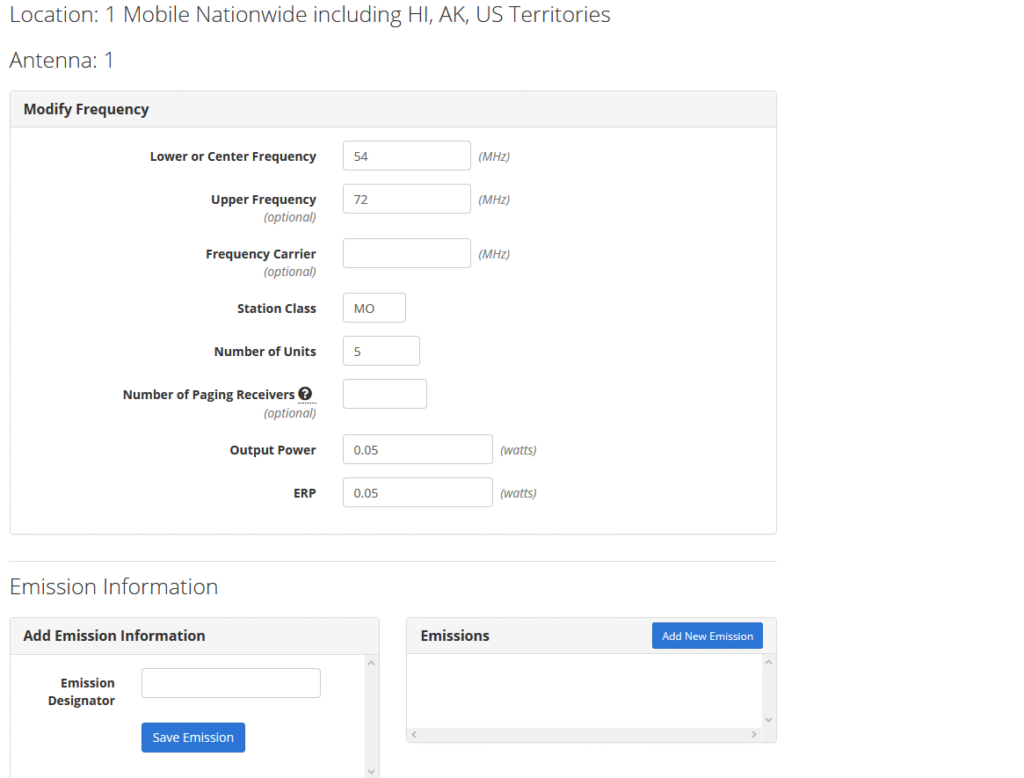
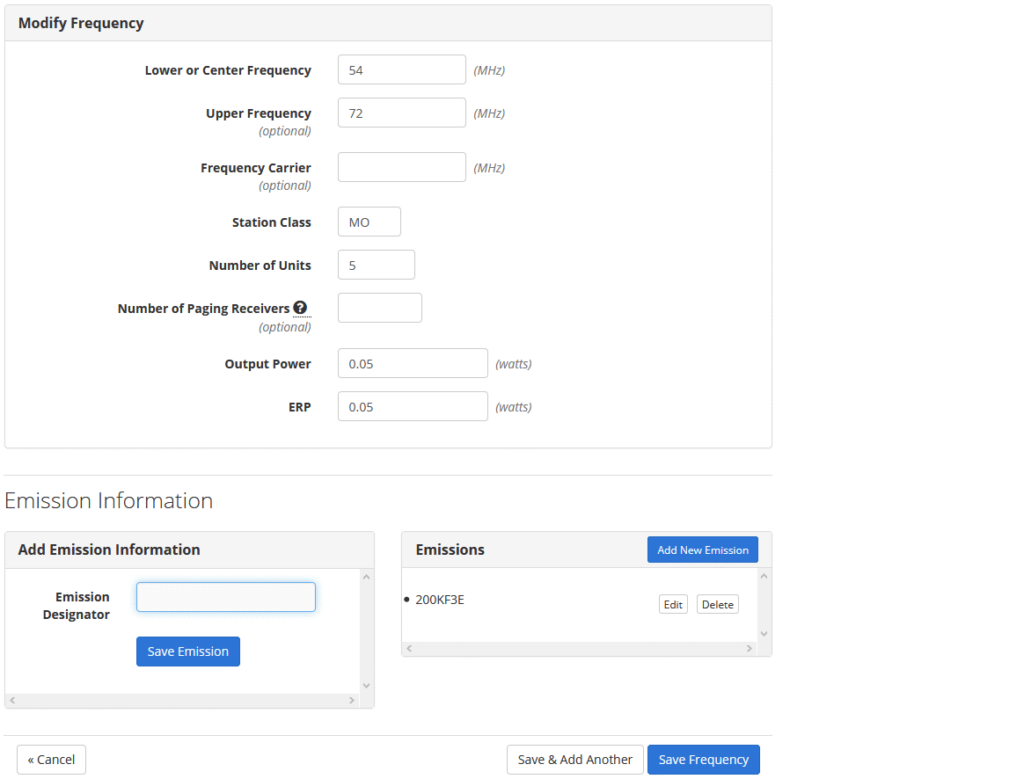
52. Scroll down to Emission Information and click on Add New Emission. Enter the Emission Designator 200KF3E. Click on Save Emission. Click on Save Frequency and that will take you back to the Edit Frequency page.
53. On the second entry click on Edit and that will bring you to the Edit Frequency page.
54. Scroll down to Emission Information and click on Add Emission Information. Enter the Emission Designator 200KF3E. Click on Save Emission. Click on Save Frequency and that will take you back to the Edit Frequency page.
55. Repeat until you have added the Emission Designator to all of the frequencies on the Edit Frequency page.
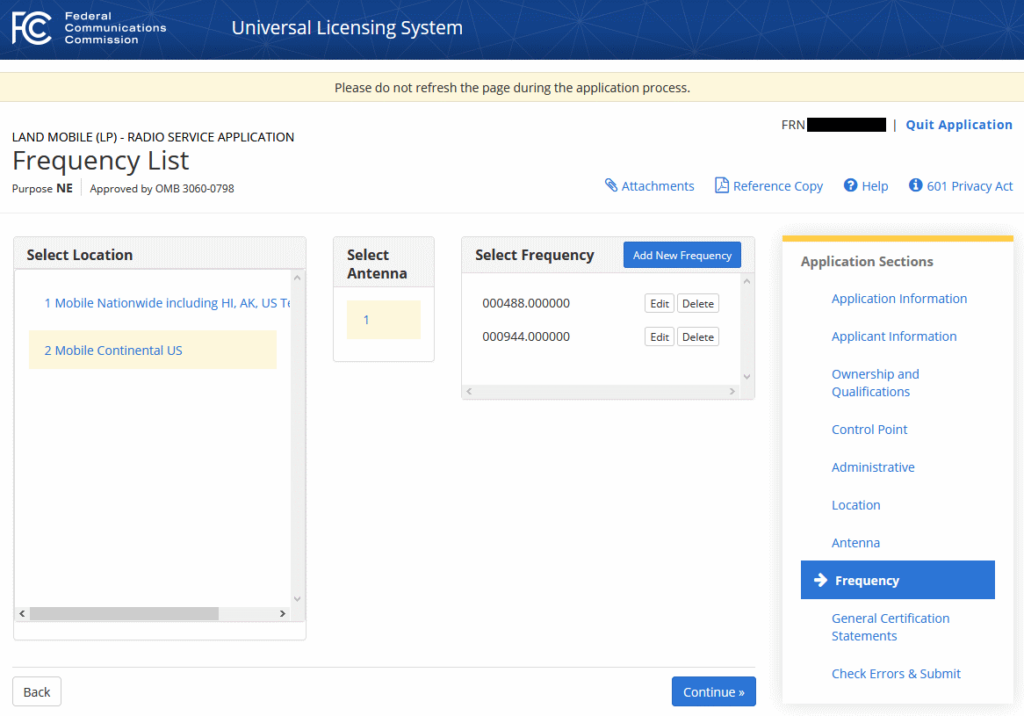
56. Now go back to the Frequency List page and click under Select Location “2 Mobile Continental US”, click on Select Antenna 1, Click on Add New Frequency.
Location Number 2; Antenna Number 1
| Lower or Center Frequency (MHz) | Upper Frequency (MHz) | Station Class | Number of Units | Output Power (watts) | ERP (watts) | Emission Designator |
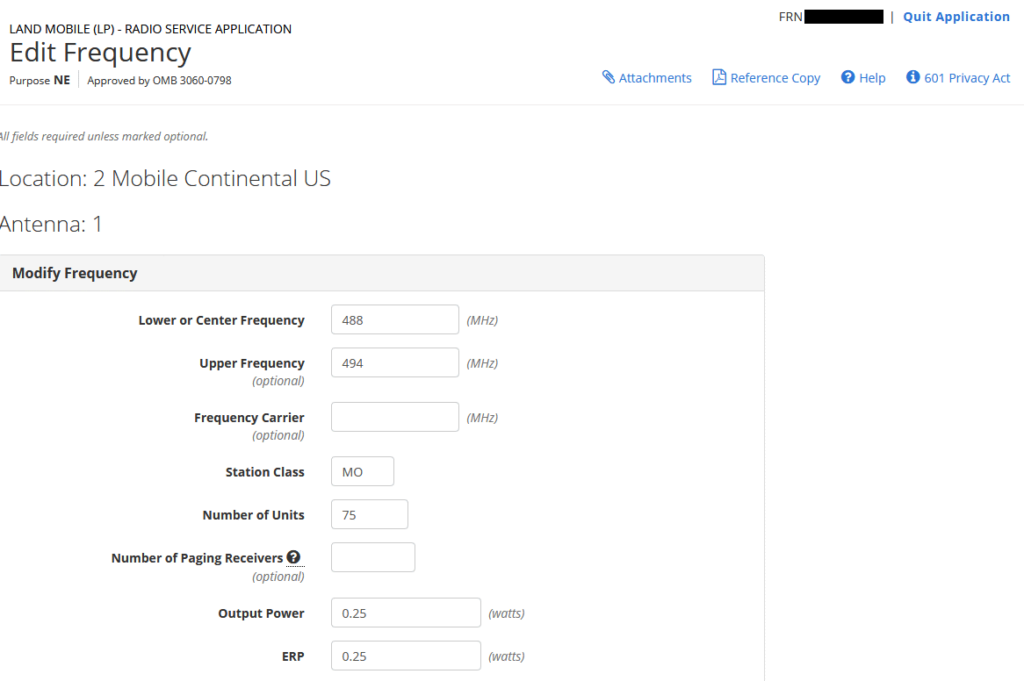
| 488 | 494 | MO | 25 | 0.25 | 0.25 | 200KF3E |
| 944 | 952 | MO | 25 | 0.25 | 0.25 | 200KF3E |
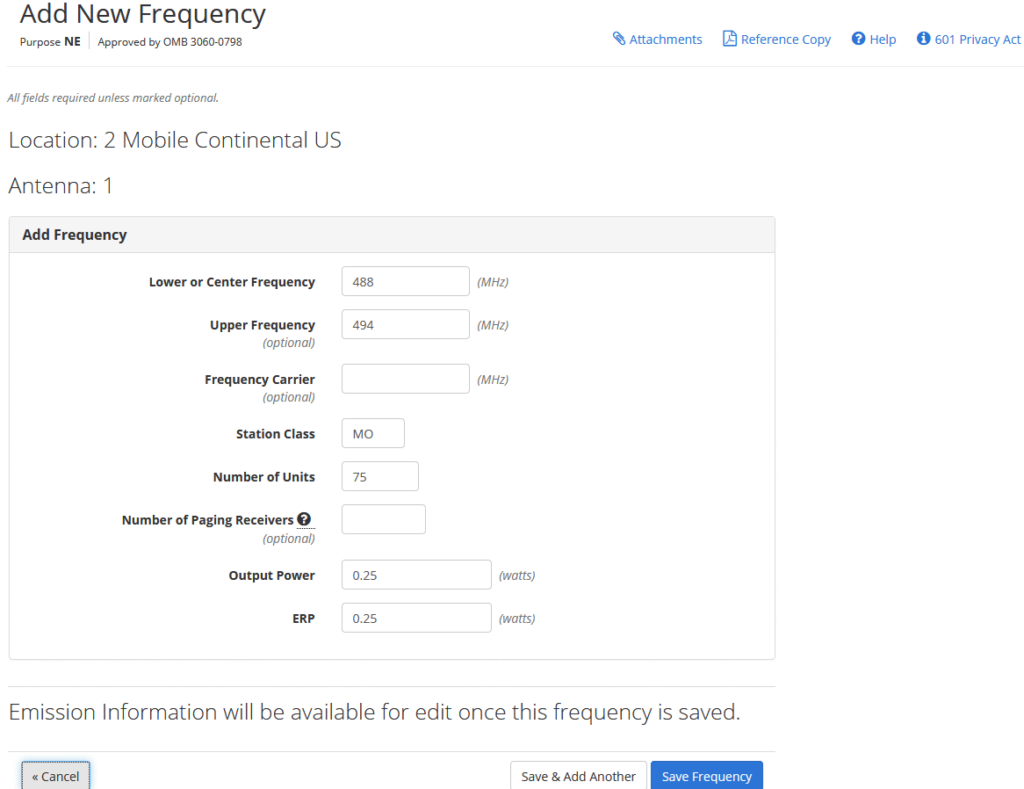
57. Enter Lower or Center Frequency; Upper Frequency; Station Class; Number of Units; Output Power; and ERP from the first row in the second table. Leave Frequency Carrier and Number of Paging Receivers blank; those fields do not apply to this application. Click on Save & Add Another and then enter Lower or Center Frequency; Upper Frequency; Station Class; Number of Units; Output Power; and ERP from the second row in the second table and then click on Save Frequency.
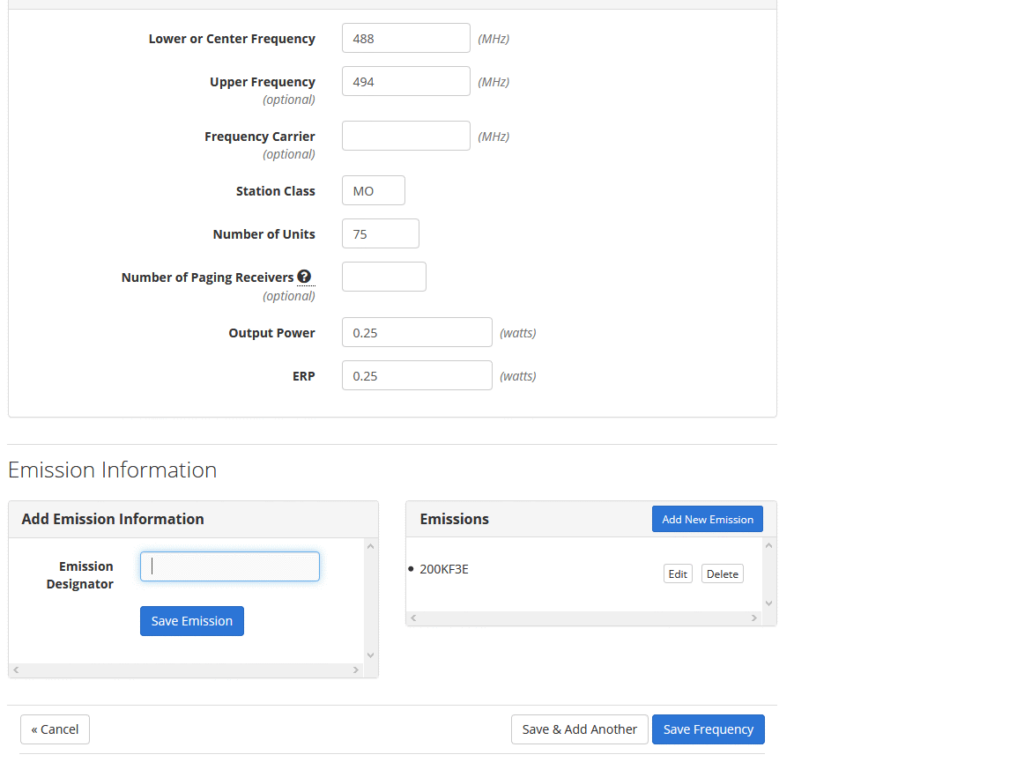
58. Now you need to enter the Emission Designator. On the first entry click on Edit and that will bring you to the Edit Frequency page.
59. Scroll down to Emission Information and click on Add Emission Information. Enter the Emission Designator 200KF3E. Click on Save Emission. Click on Save Frequency and that will take you back to the Edit Frequency page. Do the same for the second frequency.
60. You have finished the most difficult part. Now click on Continue to go to the General Certification Statements page.
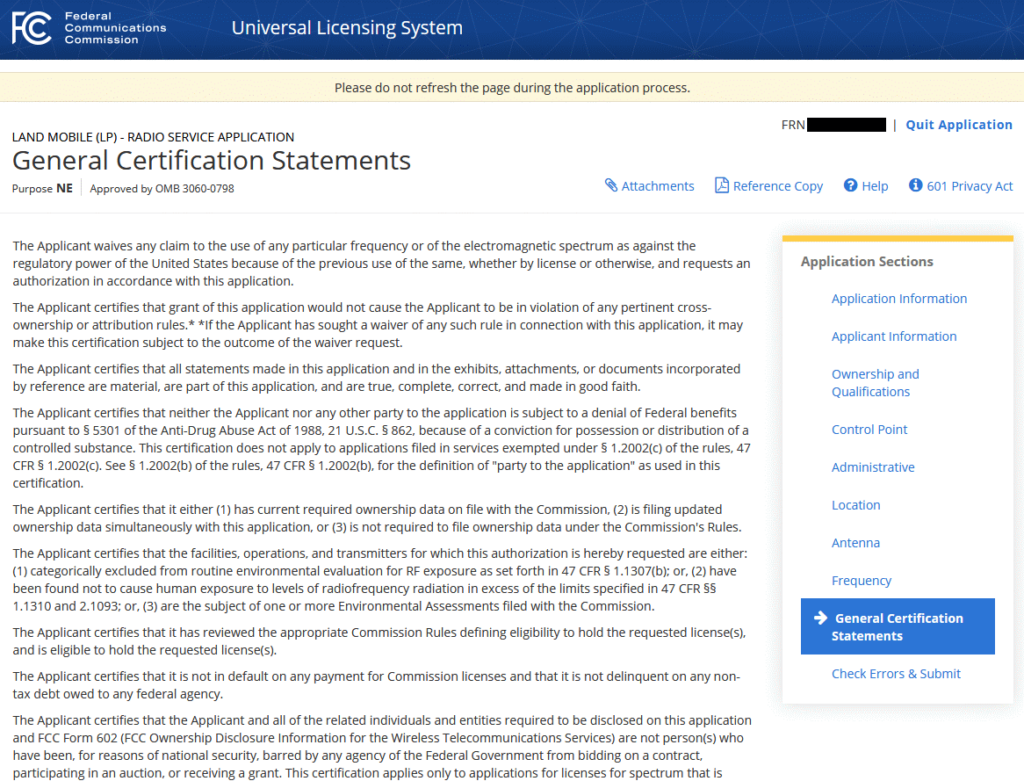
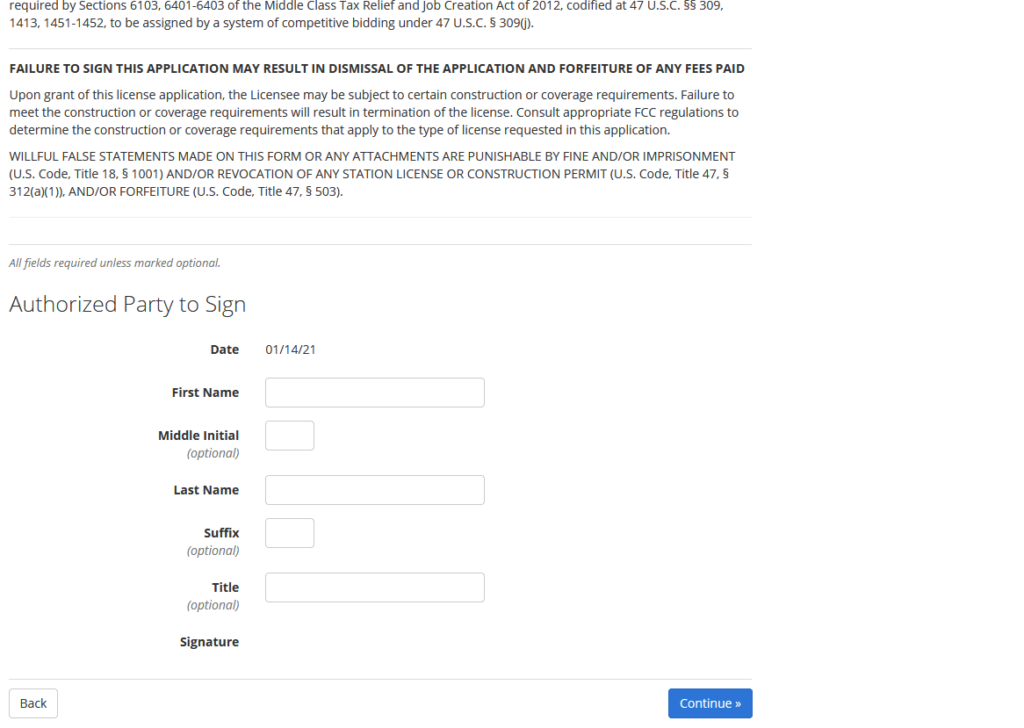
61. Read through the General Certification Statements as you will sign agreeing to them.
62. Enter under Authorized Party to Sign, First Name, Middle Initial (optional), Last Name, Suffix (optional), and Title (optional). For an Individual applicant this is the same as the licensee name. For an Individual applicant generally use “Owner” as title.
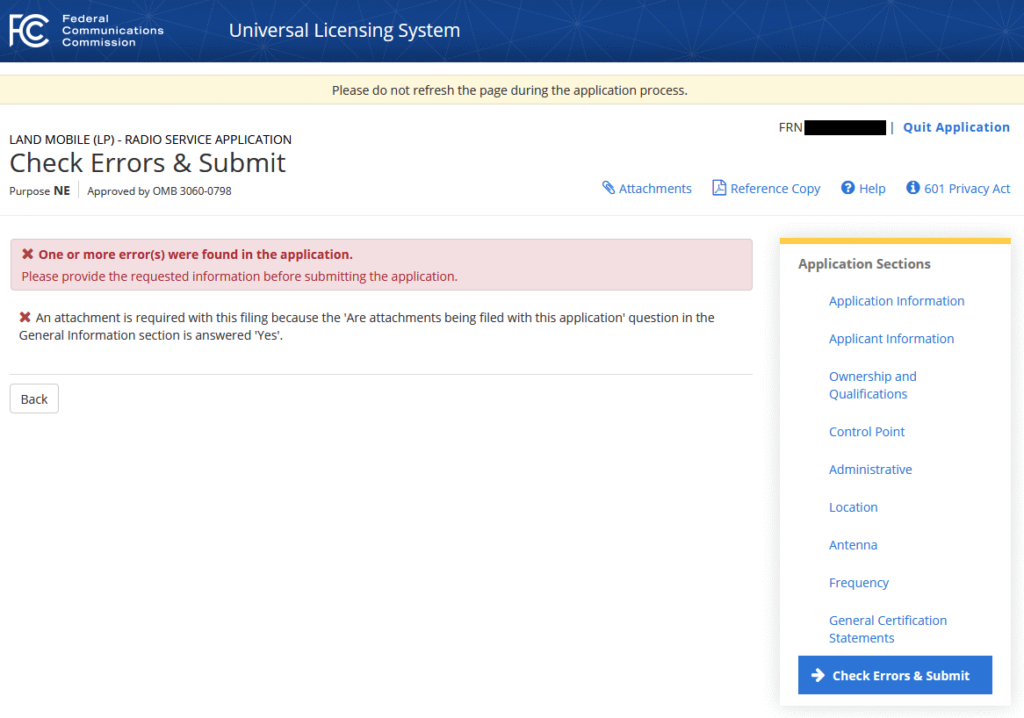
63. Click on Continue to Check Errors and Submit.
64. If everything else is entered you will get an error message stating that you have not added an Attachment. If any other errors are listed you must go back to that page and correct the error.
65. Click on Attachments in the upper right-hand corner.
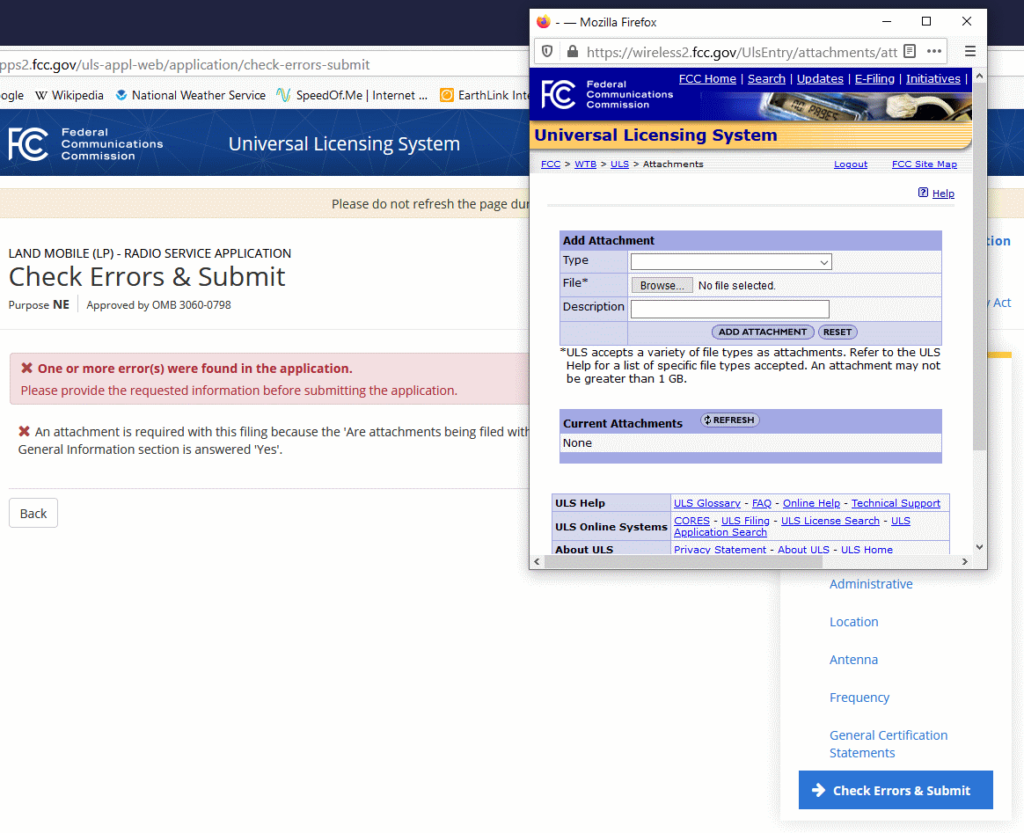
66. The Add Attachment pop-up box will appear. Under TYPE select Other.
67. Select Browse and find your “Statement of Eligibility” and click on Add Attachment.
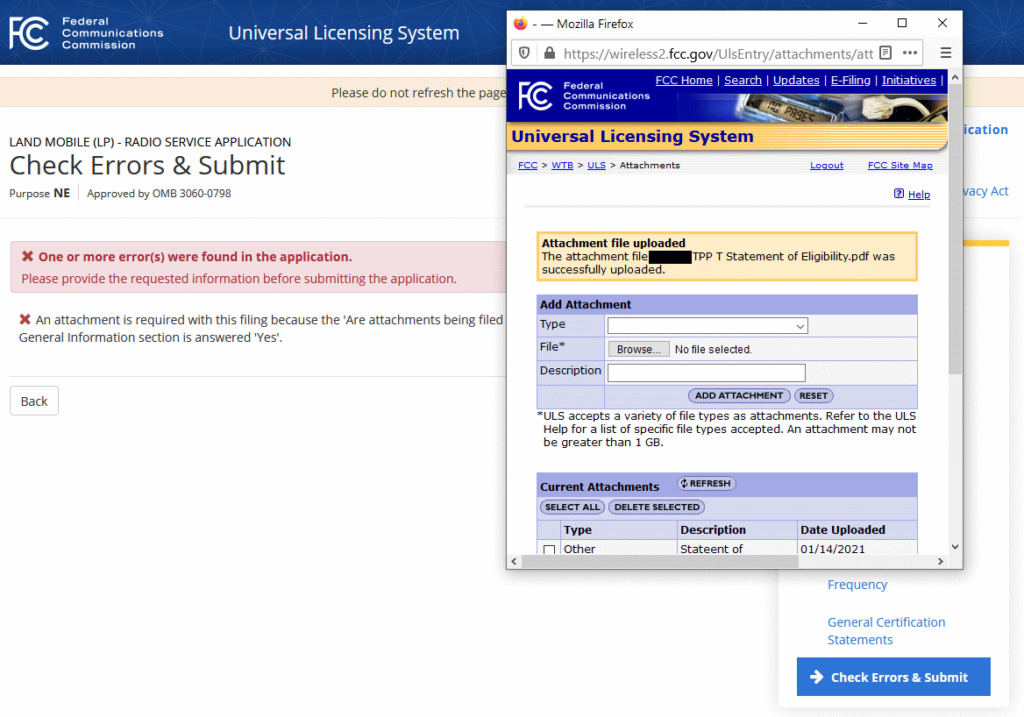
68. Under Description enter “Statement of Eligibility”.
69. You will see “[name of file].pdf was successfully uploaded”. Close the pop-up box.
70. Click on General Certification Statements to go to thatpage click and then click on Continue. You should get a message “No errors have been found.”
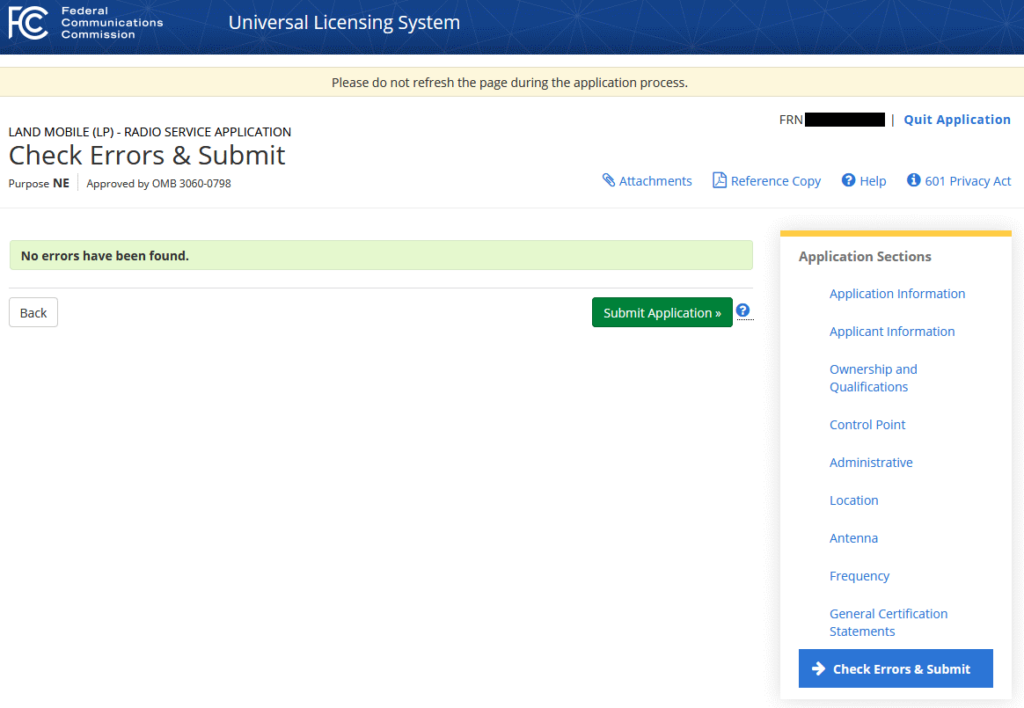
71. You can now review the application by clicking on Reference Copy in the upper right-hand corner. Review the downloaded .pdf carefully for errors. If everything is correct proceed. If not click on the appropriate section of the Application Sections box and you can go back and edit any entry. To go back to the final section, click on Continue at each page. At this point there will be another error check and you should see the message “No errors have been found.”
72. When you are satisfied that all of the data is entered correctly click on Submit Application.
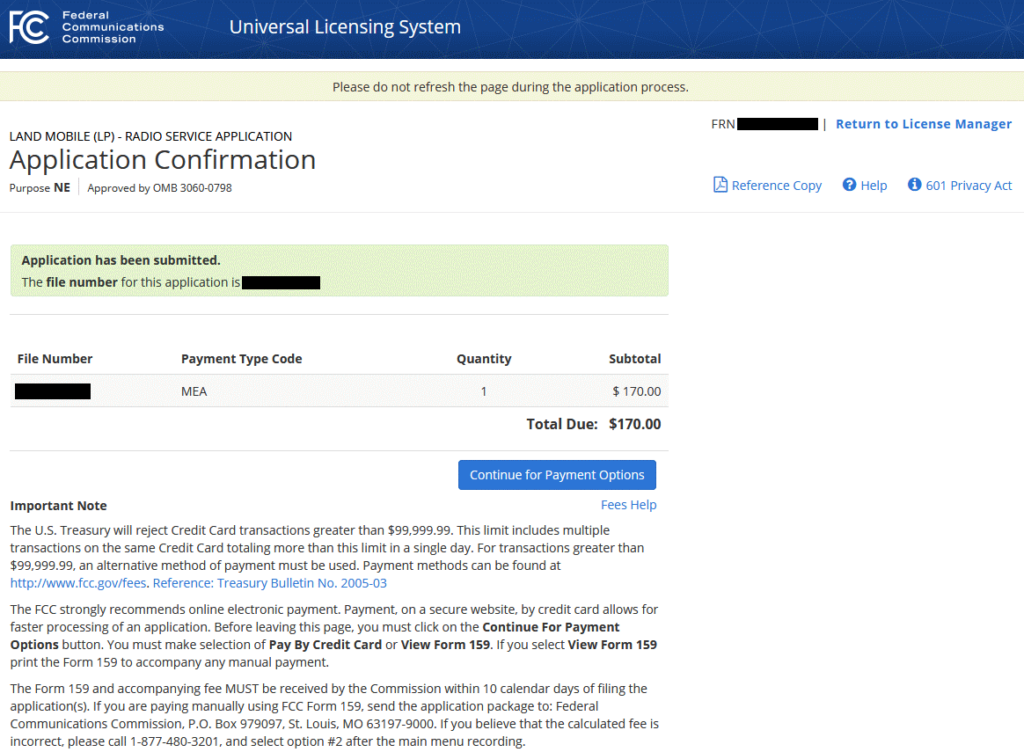
73. Application Confirmation page will show “Application has been submitted. The file number for this application is 000xxxxxxxx”. From this page you can download a .pdf of the application by clicking on Reference Copy and it is recommended that you save this file.
74. Now click on Continue for Payment Options. This will lead you to another page where you can pay the fee with a credit card.
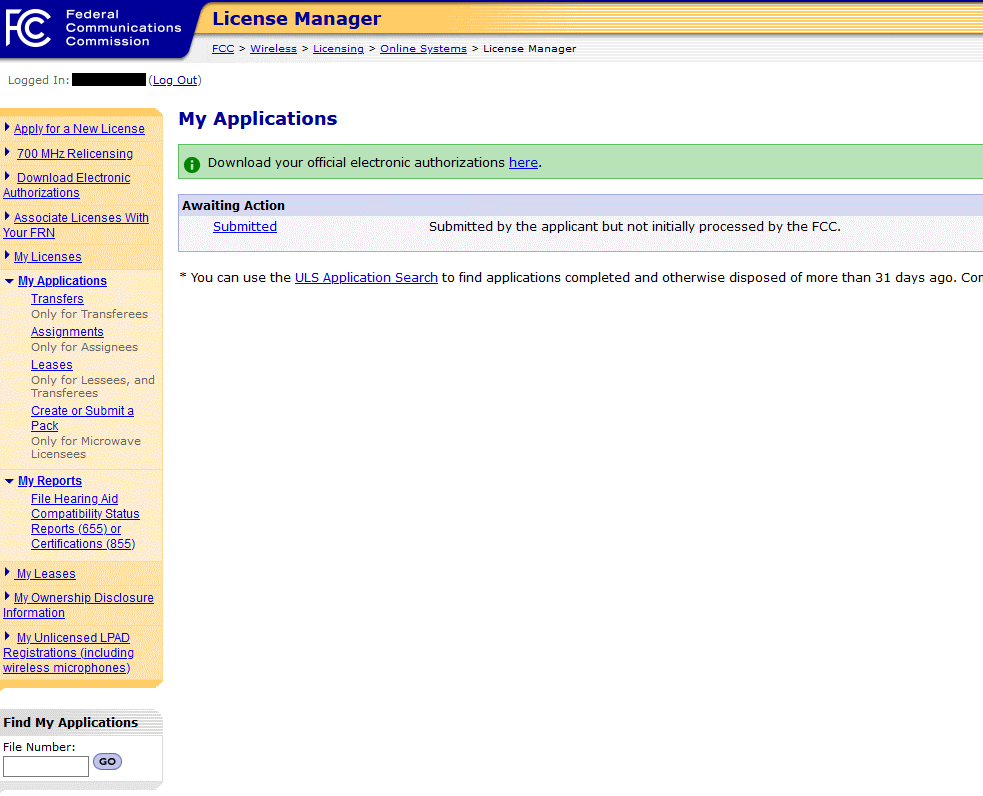
75. On the Application Confirmation page on upper right hand click on Return to License Manager. When you get to that page click on My Applications and you should see the My Applications Page. Click on Submitted.
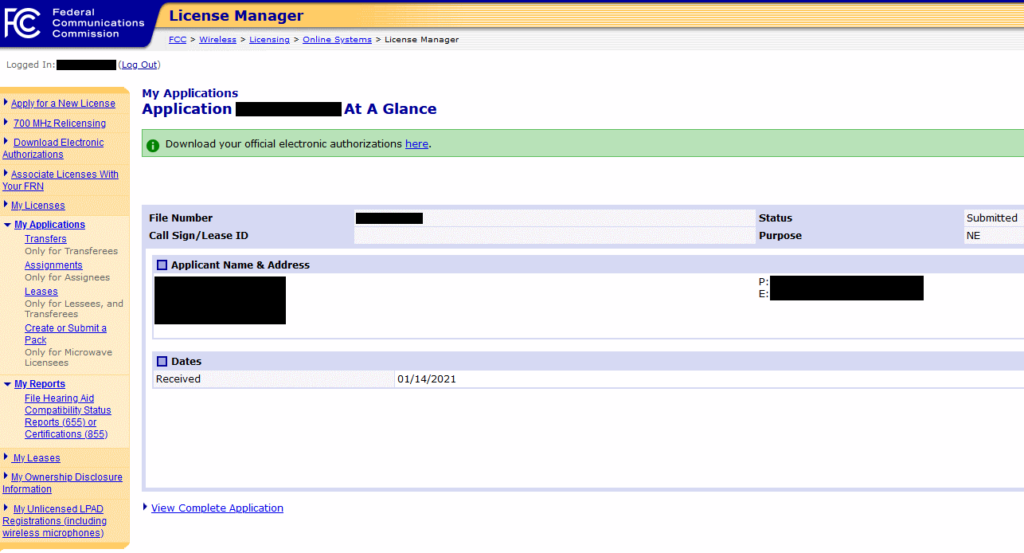
76. The My Applications — Application 00xxxxxxx At a Glance will appear to confirm the application. The status will be Submitted until the fee is paid.
Part 4 – Application Follow up
Once the application is paid the status will be shown as PENDING. This means that it is waiting for FCC action. The FCC is taking months to grant a Part 74 LPBAS license. You can check on the application status with the following steps:
1. Go to http://wireless.fcc.gov/uls/index.htm?job=home
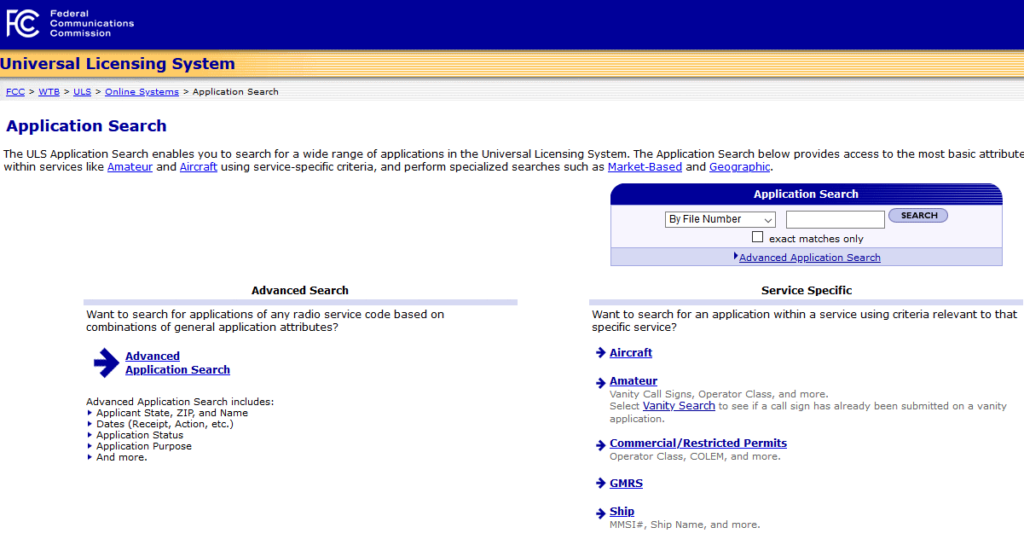
2. Scroll down to Searching and click on Application Search.
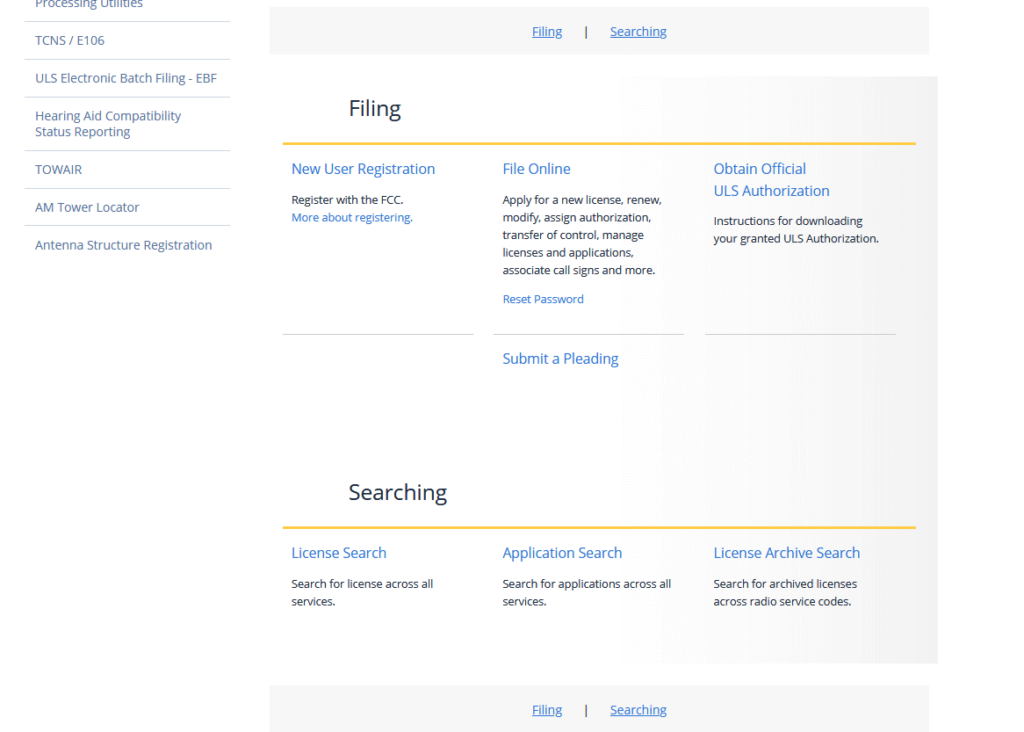
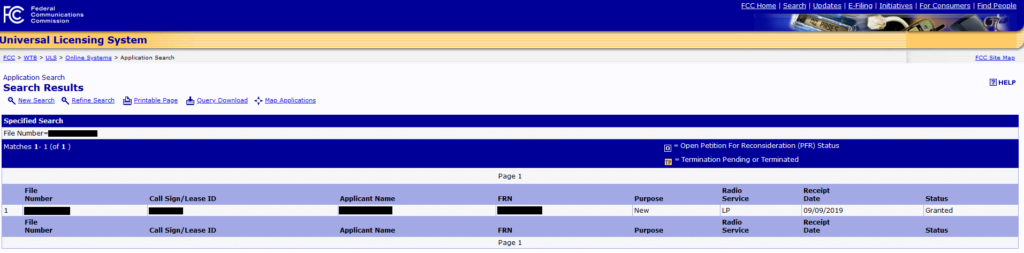
3. On the Application Search page enter all of the digits of your application including leading zeroes.
4. The Search Results page will show information about the application and on the right-hand side under Status it may show Pending.

5. When the license is granted the Call Sign / Lease ID will show the granted call sign and the status changes to Granted.
6. Should the FCC contact you about the application you will need to determine what they are asking for and make an appropriate correction.
7. The FCC requires that you keep your information up to date. If you move or change your telephone number or email you need to log in to ULS with your FRN and password and make administrative changes. The FCC has moved to all correspondence via email so it is critical to keep that information accurate.
8. It is also important to pay attention to the expiration date. Generally, the FCC will email you a courtesy notice 3 months before the expiration date, and that is a good reason why you need to keep your information up to date. It is a lot less expensive to renew a license than to let it lapse and have to completely enter a new license.
9. One warning. You may receive an official looking document from Federal Licensing, Inc. or several other companies that want you to subscribe to their FCC Rules and Regulations service. This is a scam. In the past the FCC has required that a licensee possess a current copy of the FCC Rules and Regulations but that requirement has been eliminated. Because the FCC R&R is a public document it is available for FREE from the U.S. Government Printing Office. You get it from
http://www.ecfr.gov/cgi-bin/text-idx?c=ecfr&SID=acbc2d7d00dd16474983accef897bd92&rgn=div5&view=text&node=47:4.0.1.1.3&idno=47
All you need is Part 74 Subpart H.